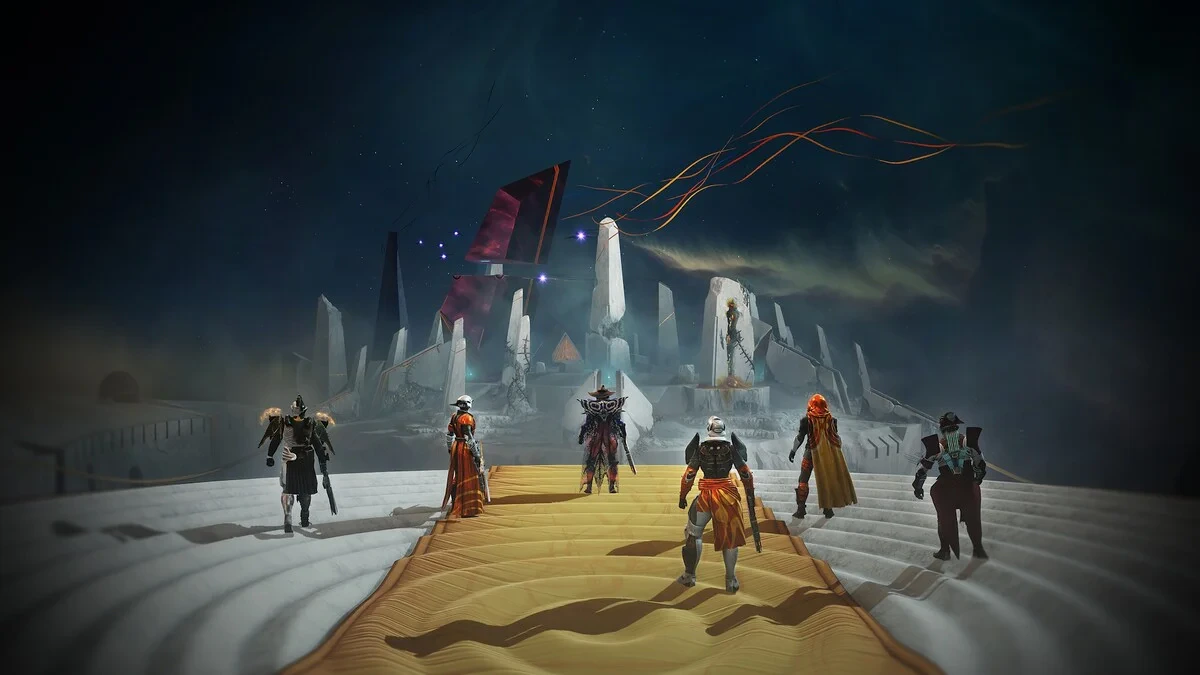
TheDesertPerpetual
A fireteam field guide for the mechanics, the damage extensions, and every Envoy’s Tog Anchor, challenge, and secret chest in the exact stretch of raid where you need it.
Name six seats once.
Put six names against P1 through P6 before the first pull. The matrix below gives every person a default job without pretending roles are permanent.
| Fight | P1 | P2 | P3 | P4 | P5 | P6 |
|---|---|---|---|---|---|---|
| Epoptes | Left reader | Right reader | Left clear | Right clear | Middle left | Middle right |
| Iatros | Left box | Hell box | Right box | Climber | Roam | Roam |
| Agraios | Detain runner | Buff holder | Buff holder | Buff holder | Chronons | Chronons |
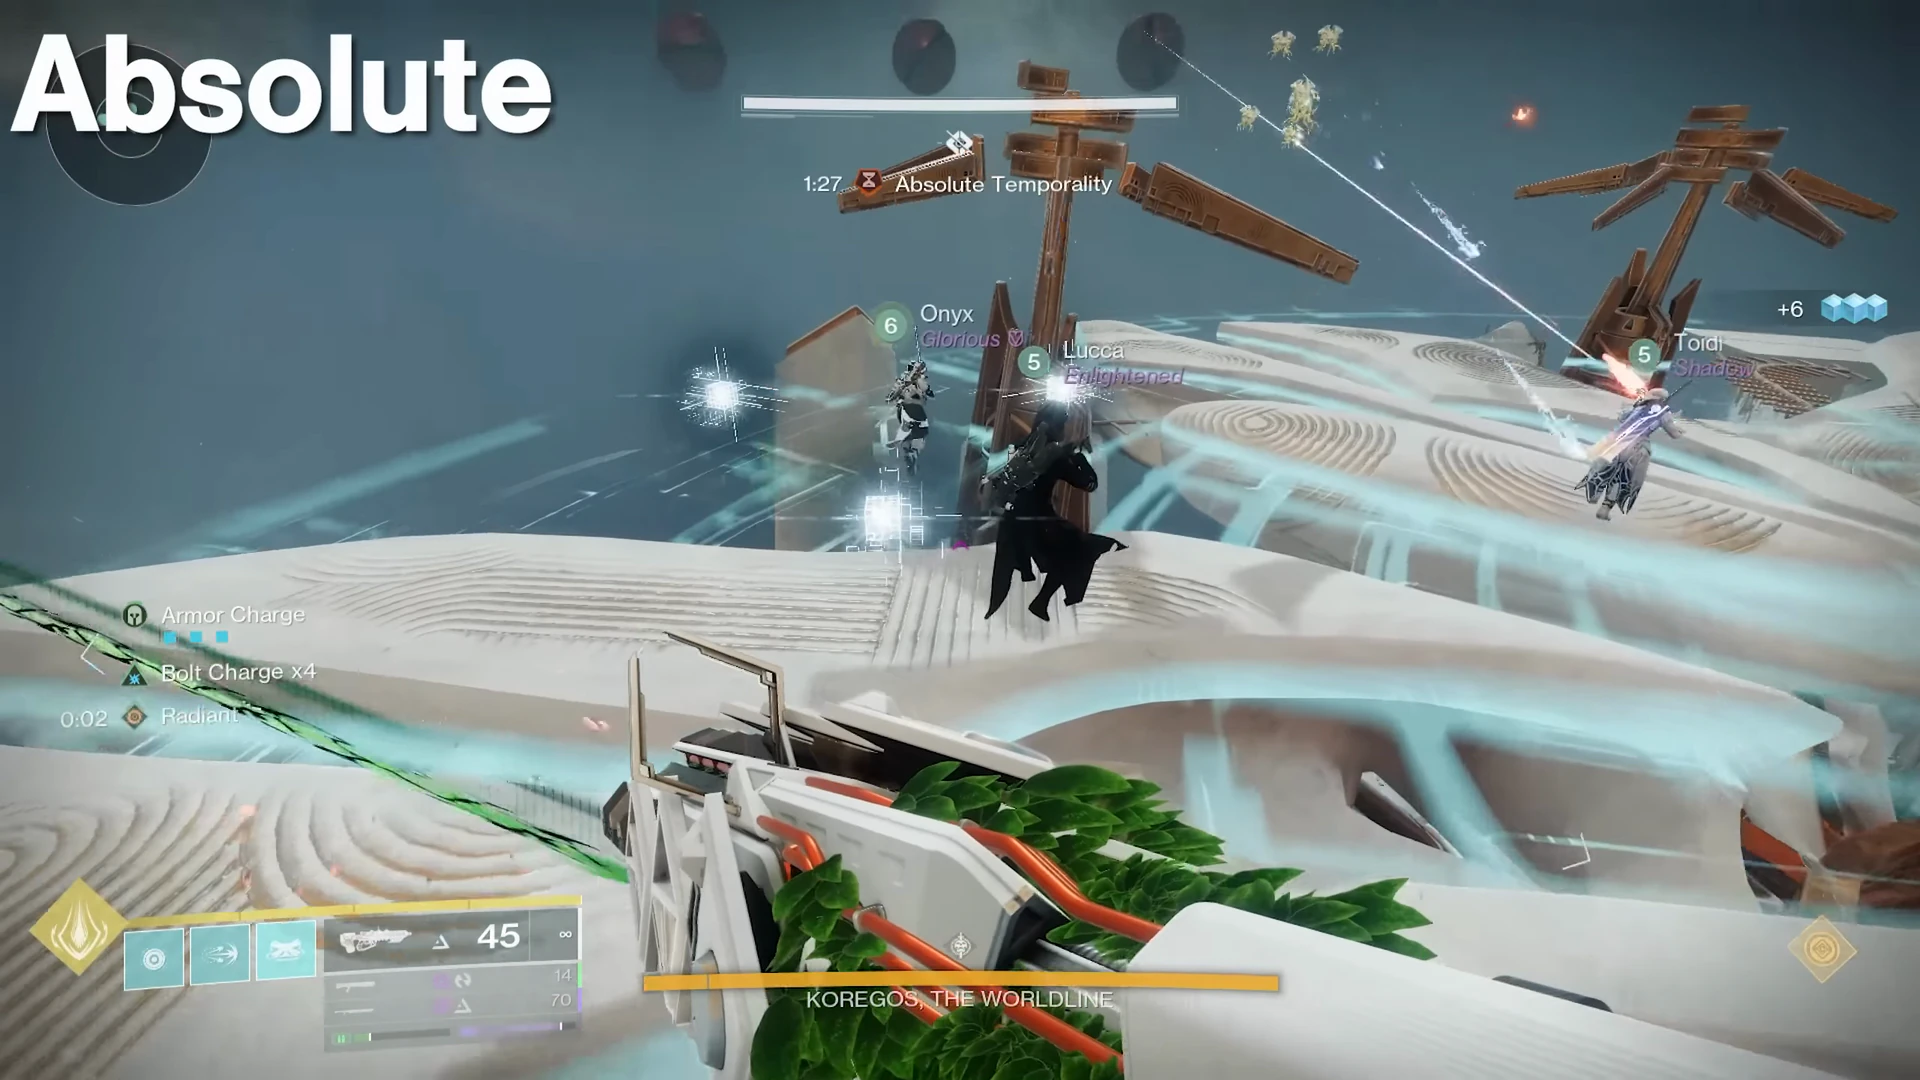
| Koregos | Constant | Constant | Absolute | Cyclical | Cyclical | Roam |
Monument damage board
Pick one lane the whole team can execute, then bring one reliable debuff, one safety Super, and damage Supers. The encounter cards below narrow this by boss range and movement.
Thunderlord
This is the low-friction answer for the three ranged bosses: easy tracking, forgiving ammo use, and no swap rotation to drop while mechanics move. Hold the trigger, keep the debuff active, and spend the team's attention on extensions instead of a combo.
Refurbished A499
The best non-burst workhorse when you can repeatedly land the crit: enormous total damage, excellent ammo economy, and useful mechanic shots. Prioritize Aggregate Charge; Snapshot Sights, Flared Magwell, and Accelerated Assault complete the ideal roll.
Grand Overture
Build its missile meter before damage, special-reload to prime the volley, then unload as Iatros lands. This keeps the team out of melee and clear of stomps. The damage loop works without the catalyst, and the weapon is not a raid drop.
Three choices. One useful order.
The first three bosses are nonlinear. This Page follows Llama’s first-clear route because it introduces the eye relay, then the four-count, then the five-ring run before Koregos combines them.
Place three in the hub
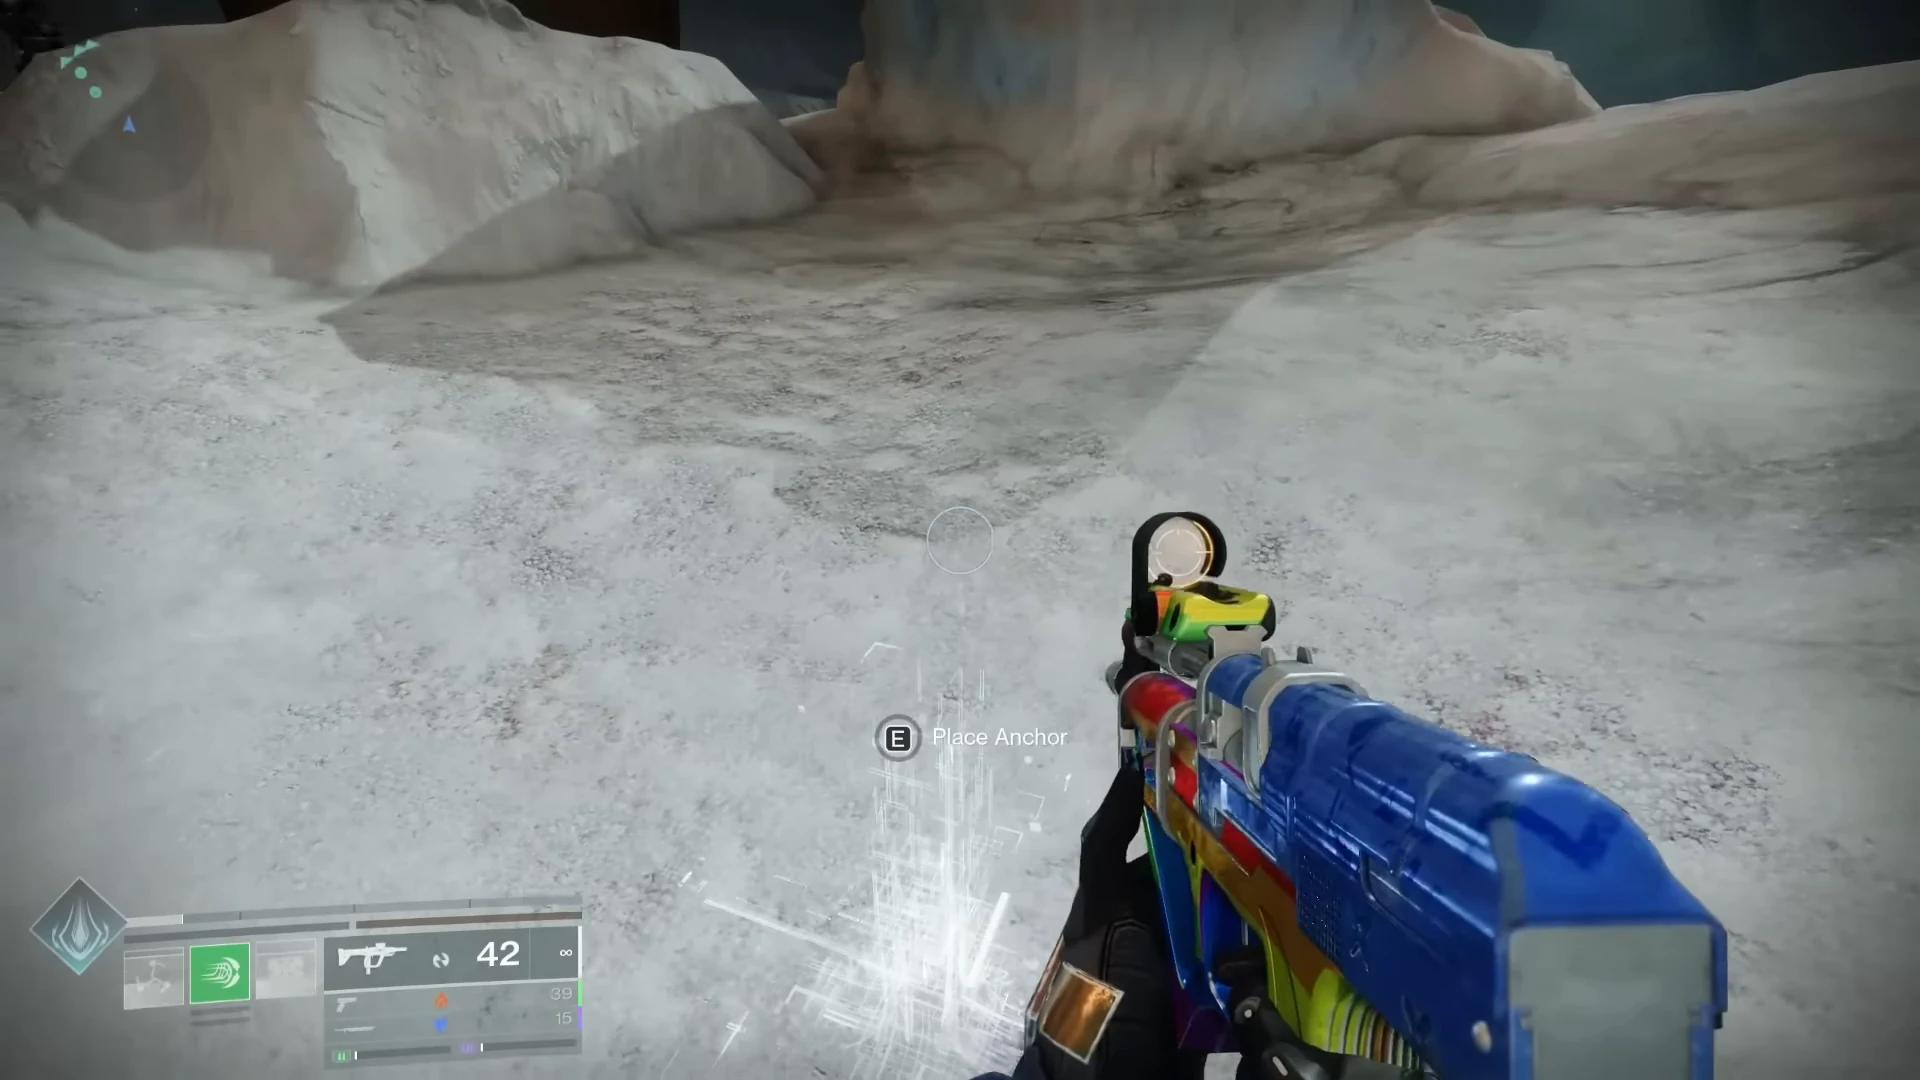
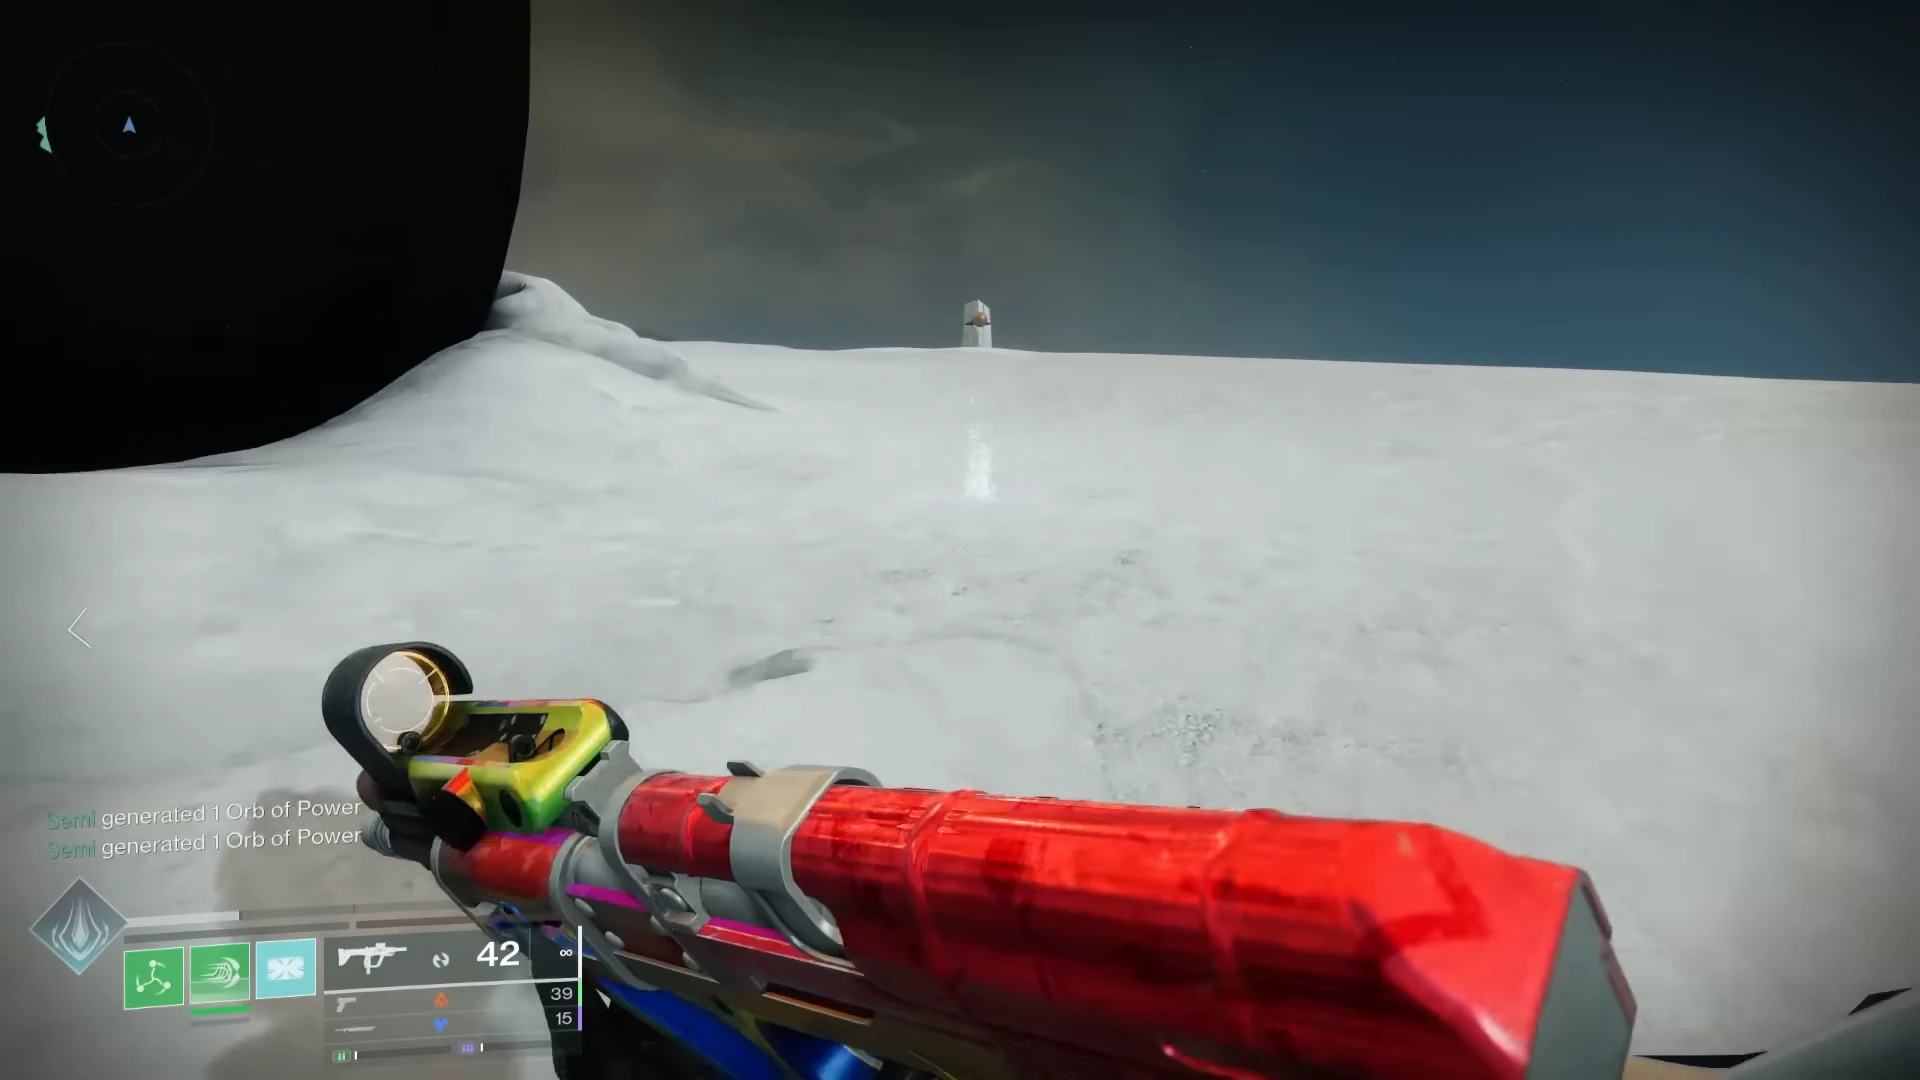
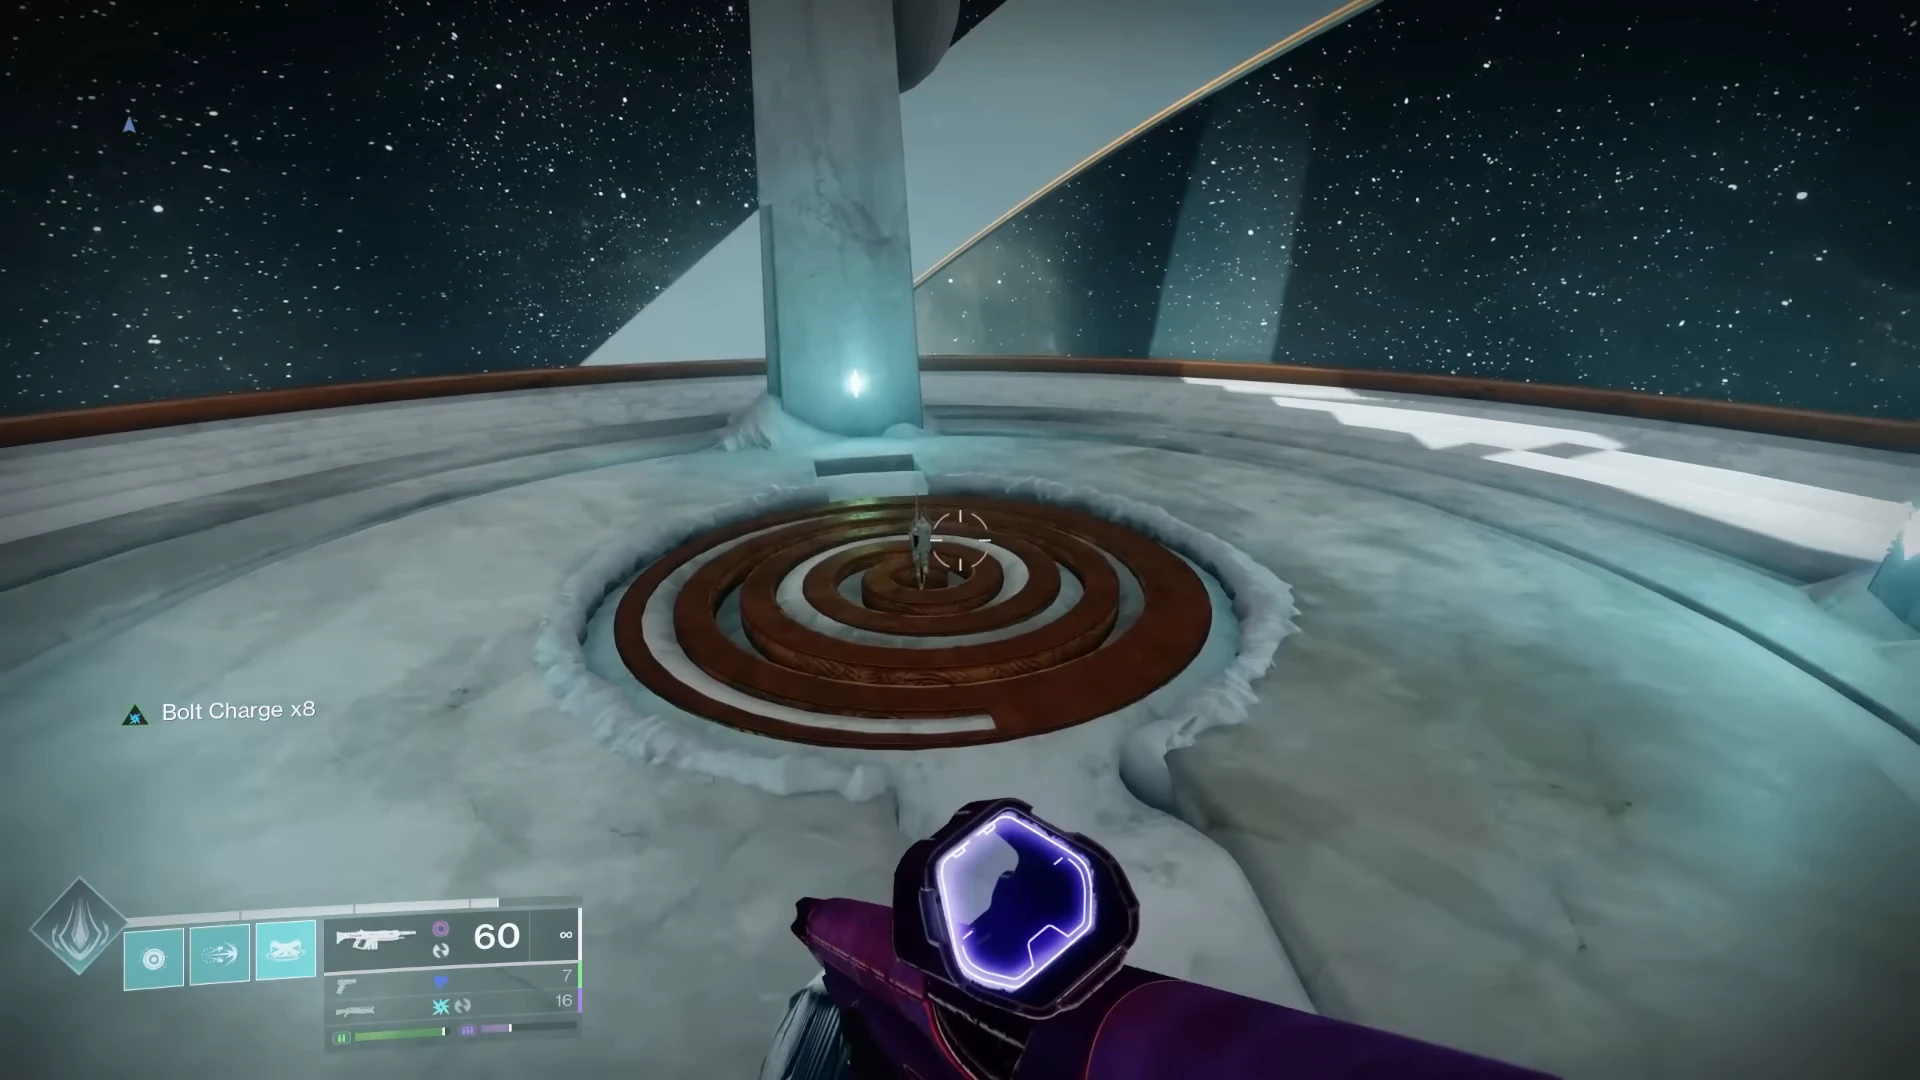
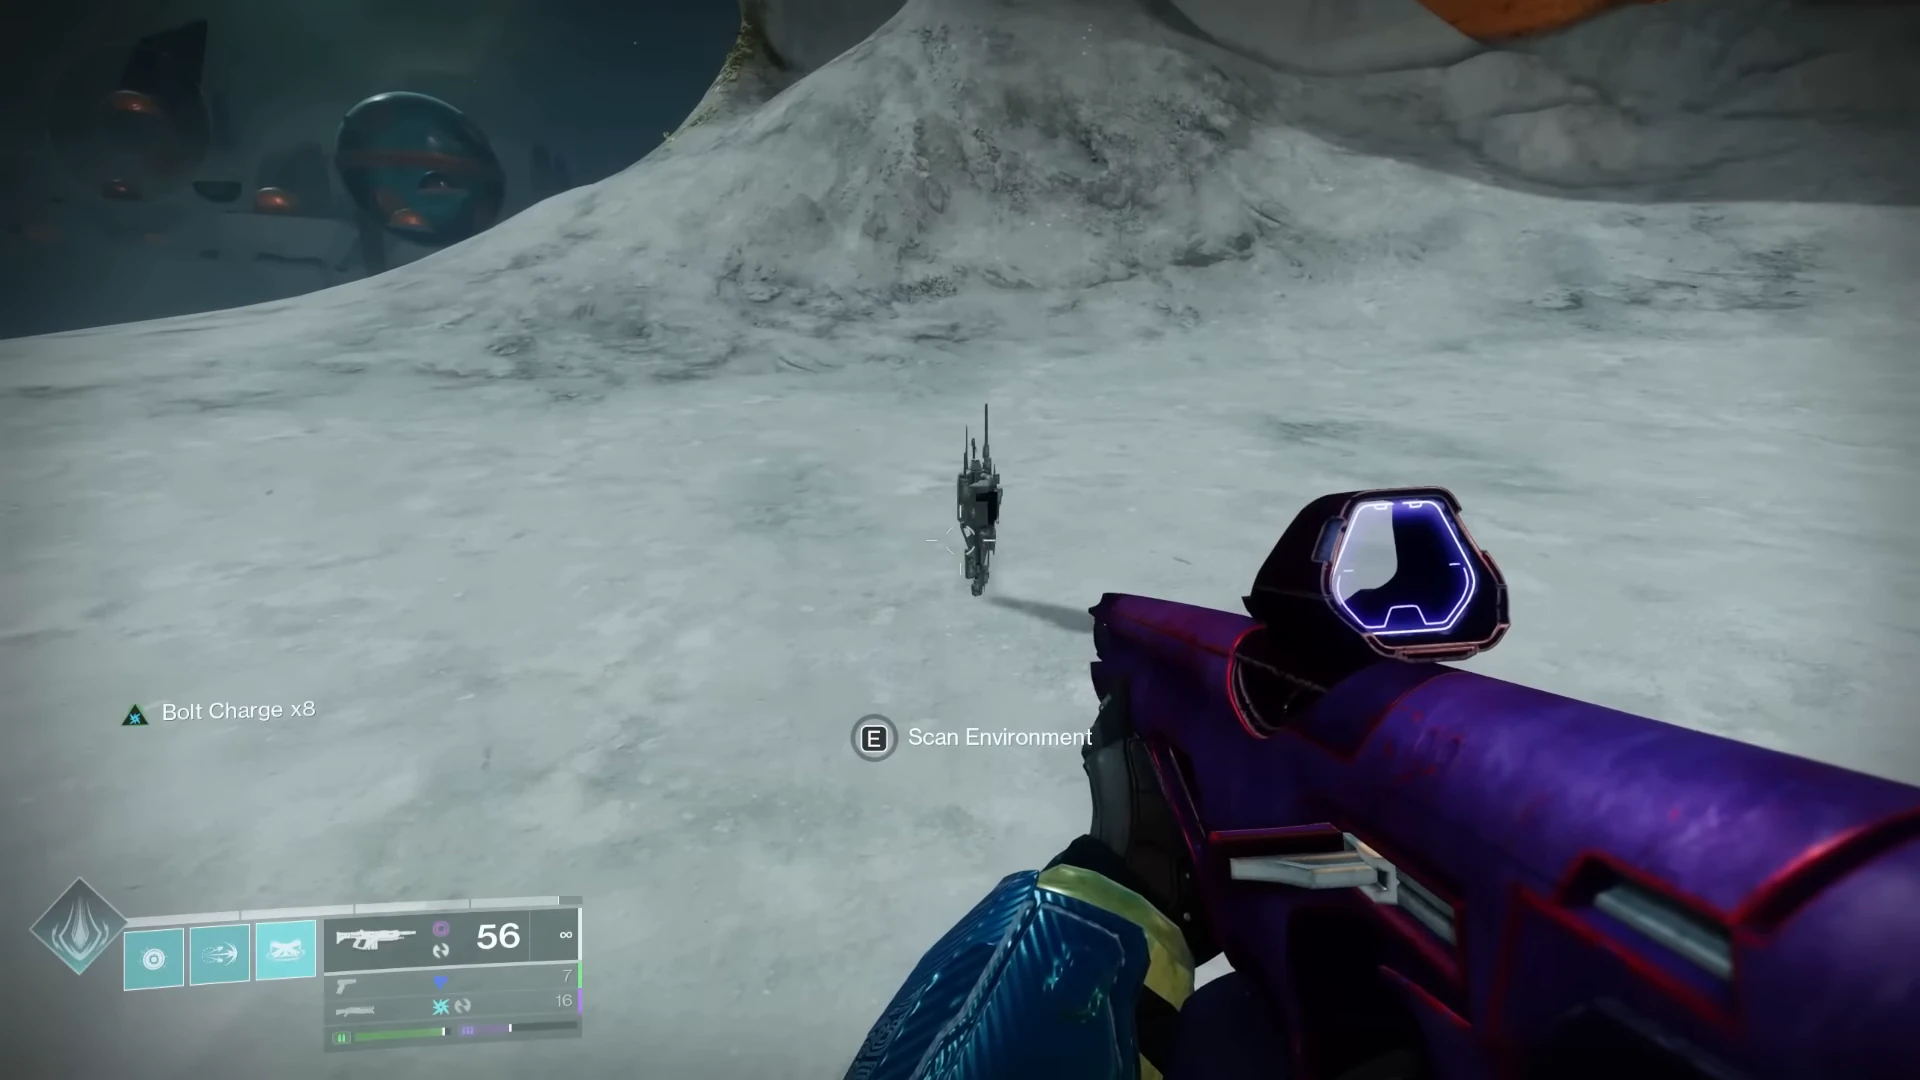
- 1Spawn leftFrom raid spawn, follow the left dune into the shallow grey hollow.
- 2Spawn rightMirror the first route and climb the open white crest right of raid spawn.
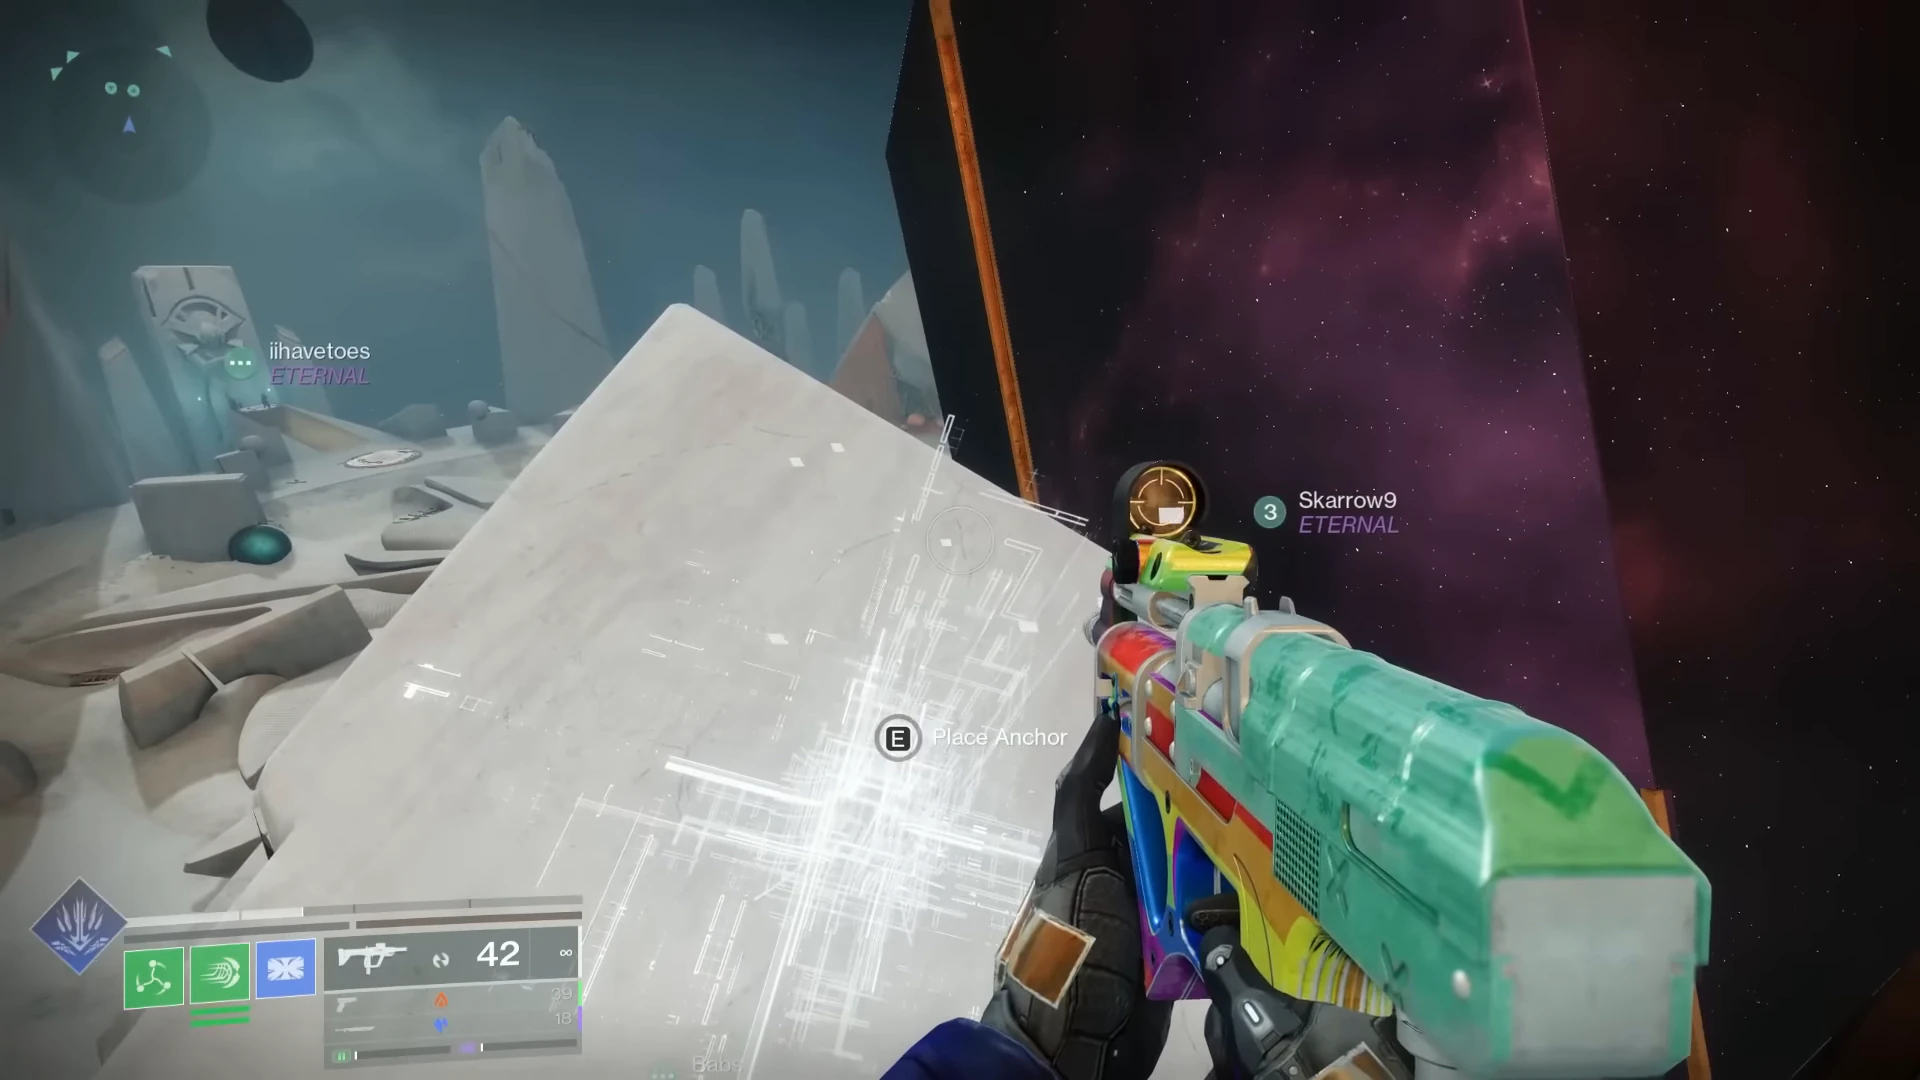
- 3Final platform pillarClimb the back-left pillar of Koregos' main platform, close to the rally flag.
Epoptes
Lord of Quanta · Hydra
Left podiumTwo teams of threeAnchors 4–6
Two side rooms trade eye locations across the arena. The middle pair takes over during Function Collapse, then every Guardian rotates through a shield during damage.
Anchors
This optional quest stop is separate from the raid mechanic. Map and Territory needs 12 Anchor placements: two on this approach and one after Epoptes dies.
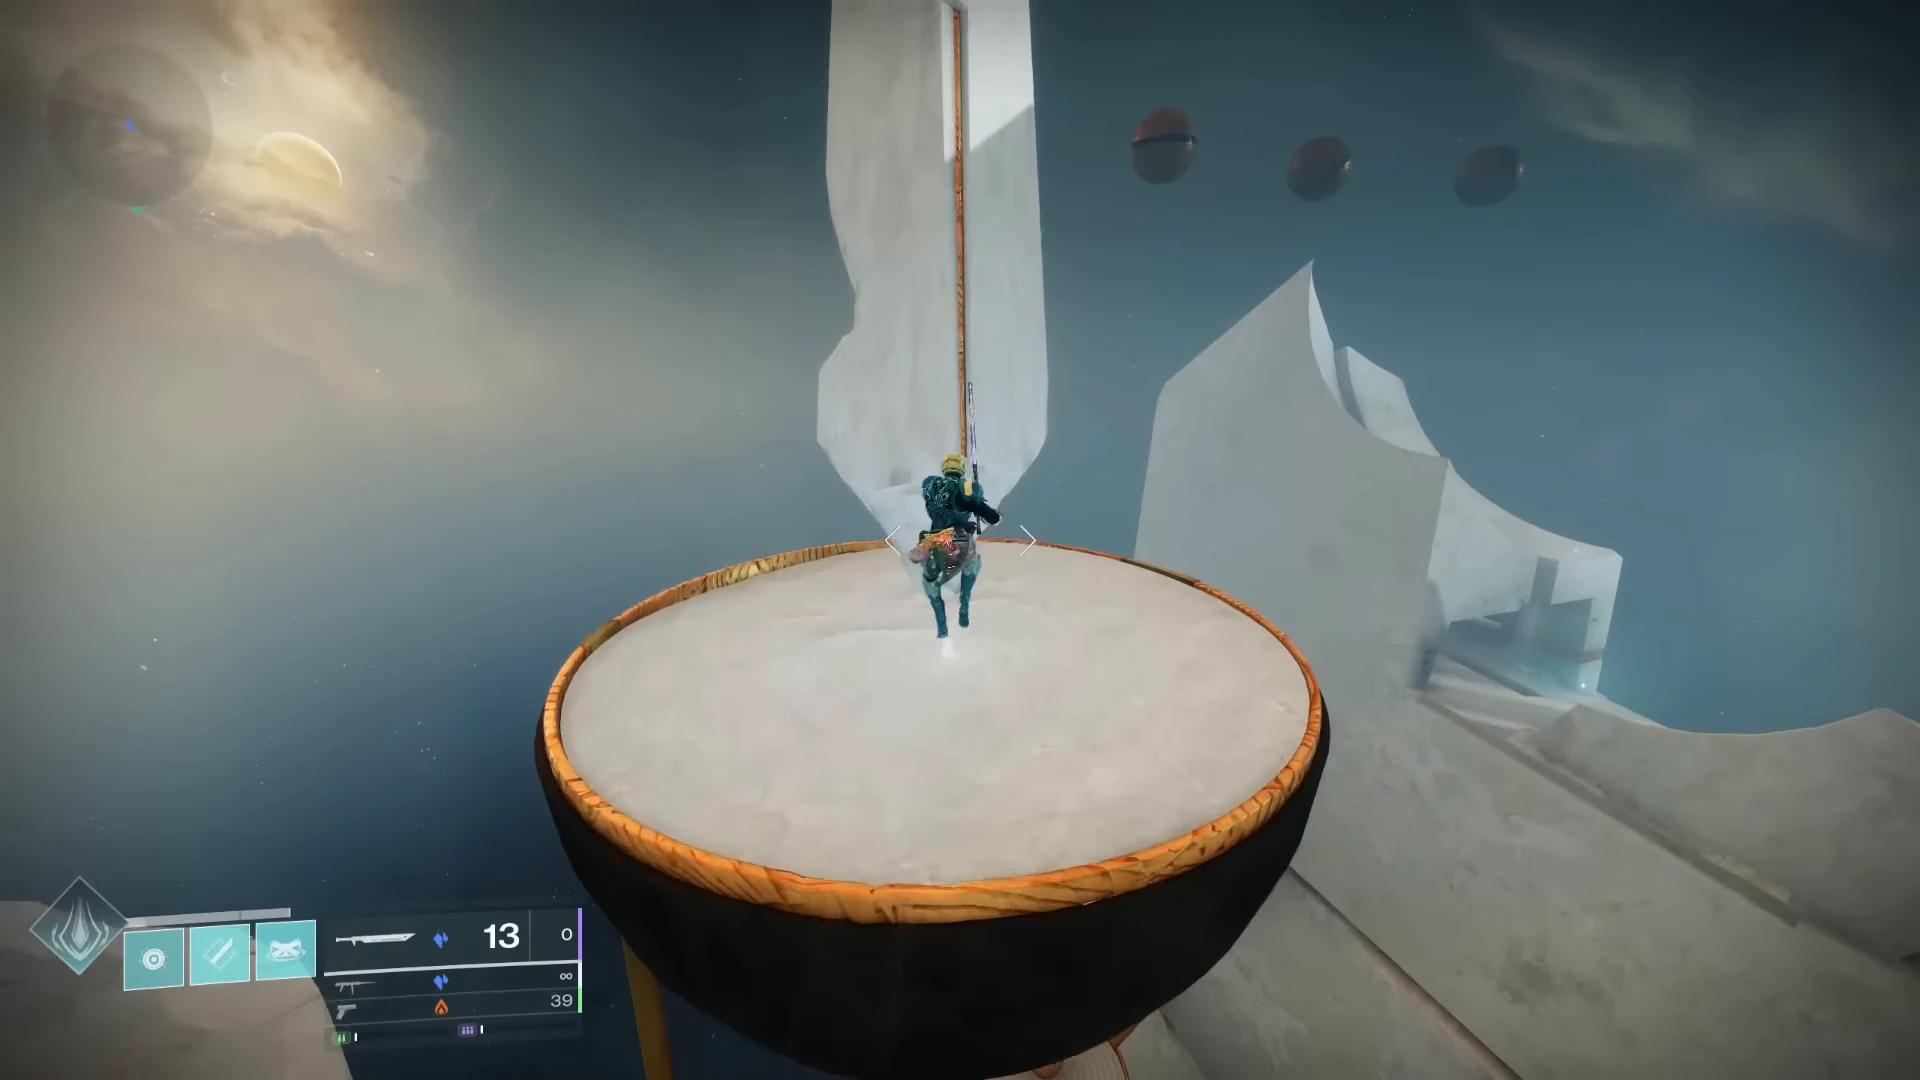
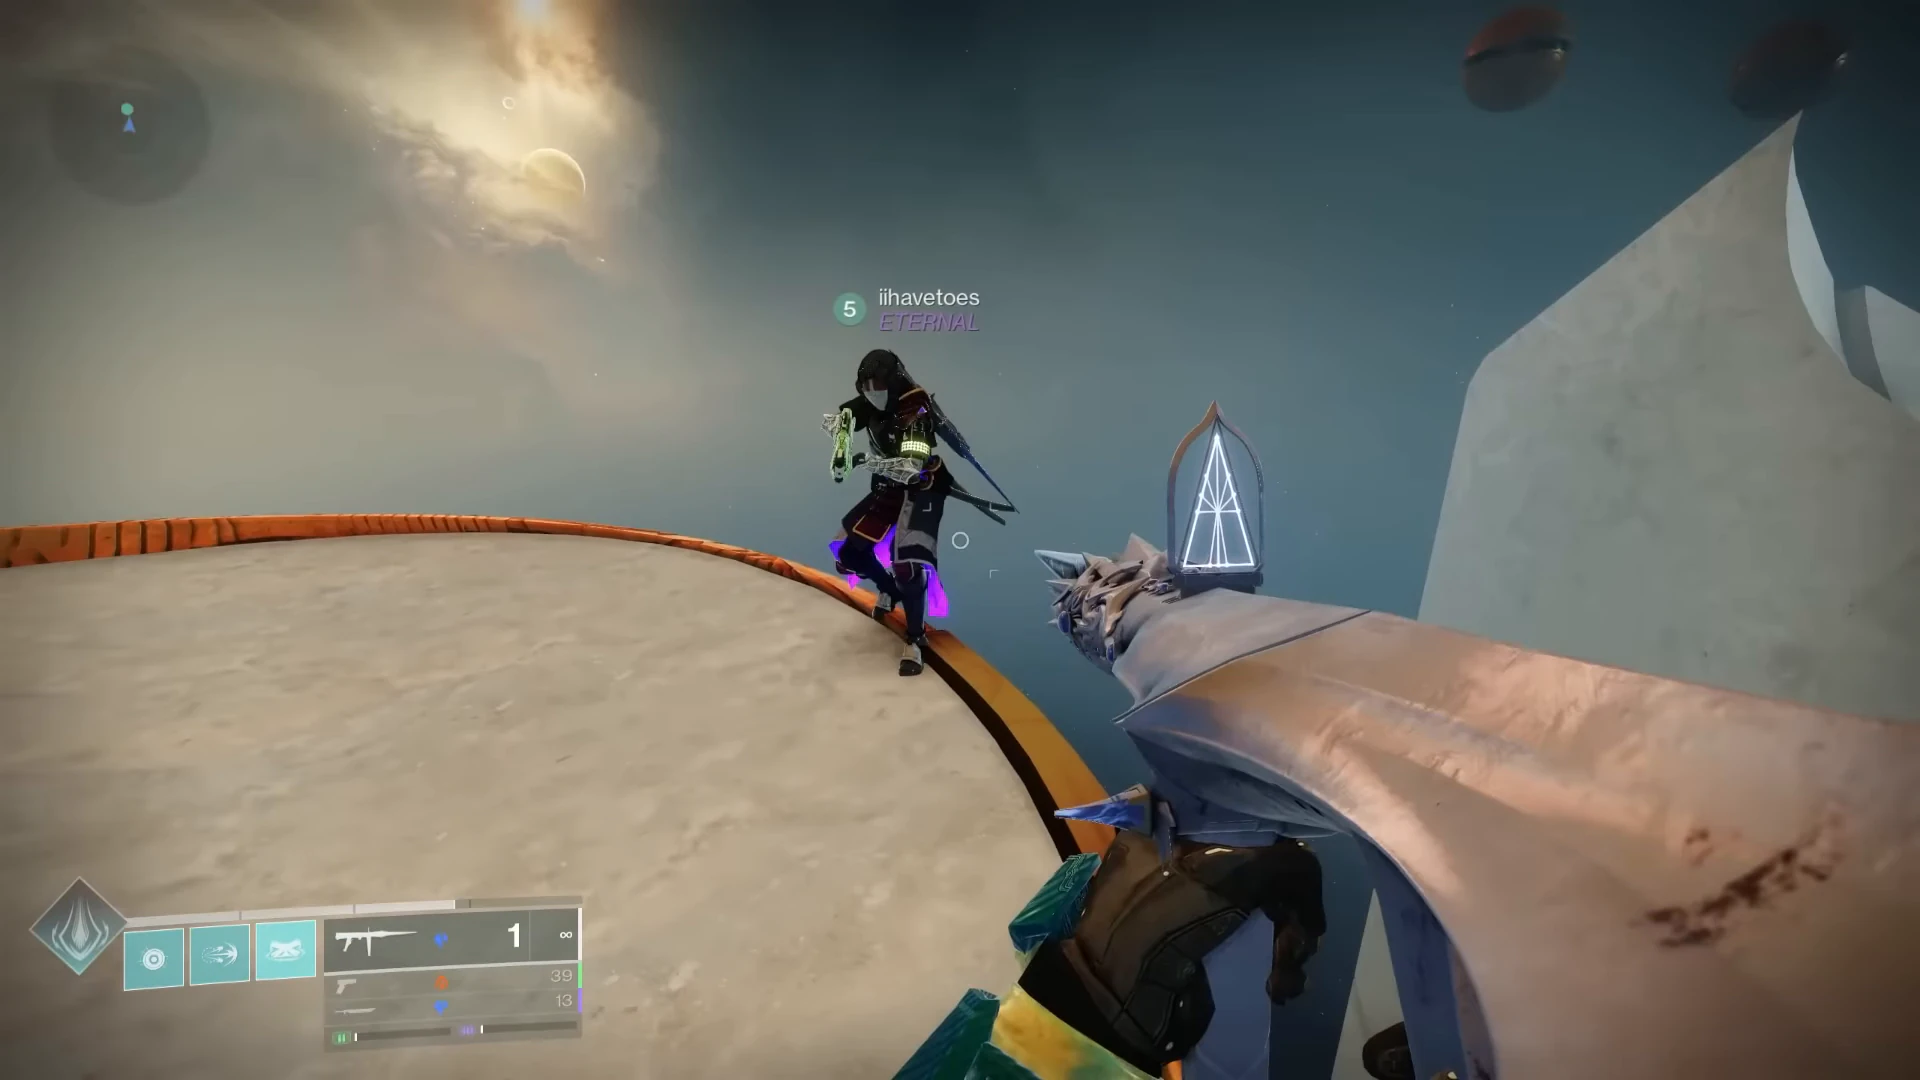
Place both before the door
Anchors 4–5 of 12. Both exist during the approach and can disappear when someone interacts at the boss door. Confirm two placements before entering.
Encounter
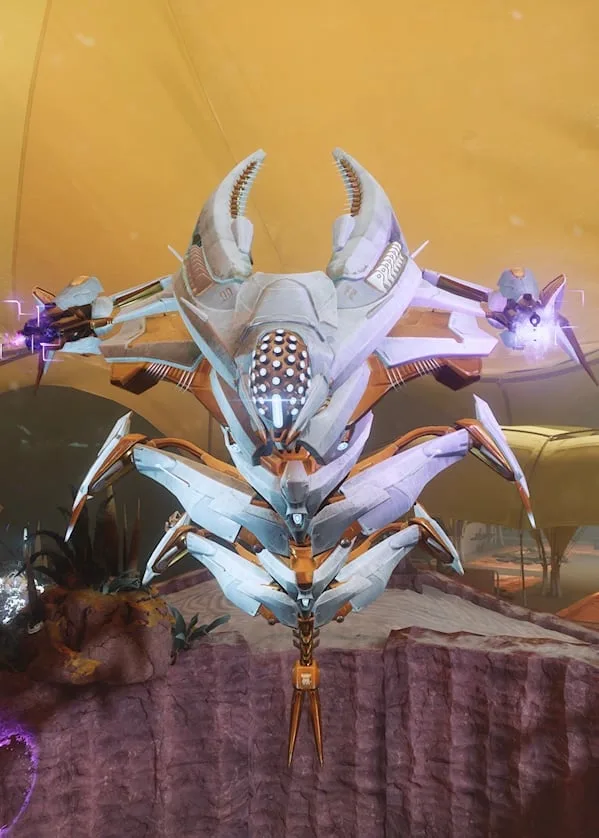
Quest check complete. Use the portrait below to identify Epoptes, assign P1–P6, then work through mechanics, challenge, and damage.
Cross the call. Break the matching eye.
In-game portrait via Destinypedia · image © BungieSide rooms and Function Collapse
- Open the plates
Kill both Time’s Magistrates. P1 takes the left plate and P2 takes right, then each enters their side room with one add-clear. The buff names do not change either job here.
- Trade three, stage, then break four
Stand inside the shield’s projected light. Read the eye shown on your obelisk; the opposite reader breaks that same position on their shield. Fast teams pause after eye three until the middle pair says ready, then break eye four together to start Function Collapse on a clean call.
- Freeze the side timers
P1 and P2 stay in their projected light during collapse. The light stops their Temporality countdown even though they cannot progress the room yet.
- Middle pair cancels collapse
P5 and P6 take the plates, step into the central projection, and call the single dark triangle node to their side holder. They also cross-shoot the two lit eyes on each other’s central obelisk face.
- Finish each Lens
P1 and P2 rebuff and resume the exchange. On the sixth outer eye, break it immediately, then break center. Return to middle and break the boss’s center eye from both sides to open damage.
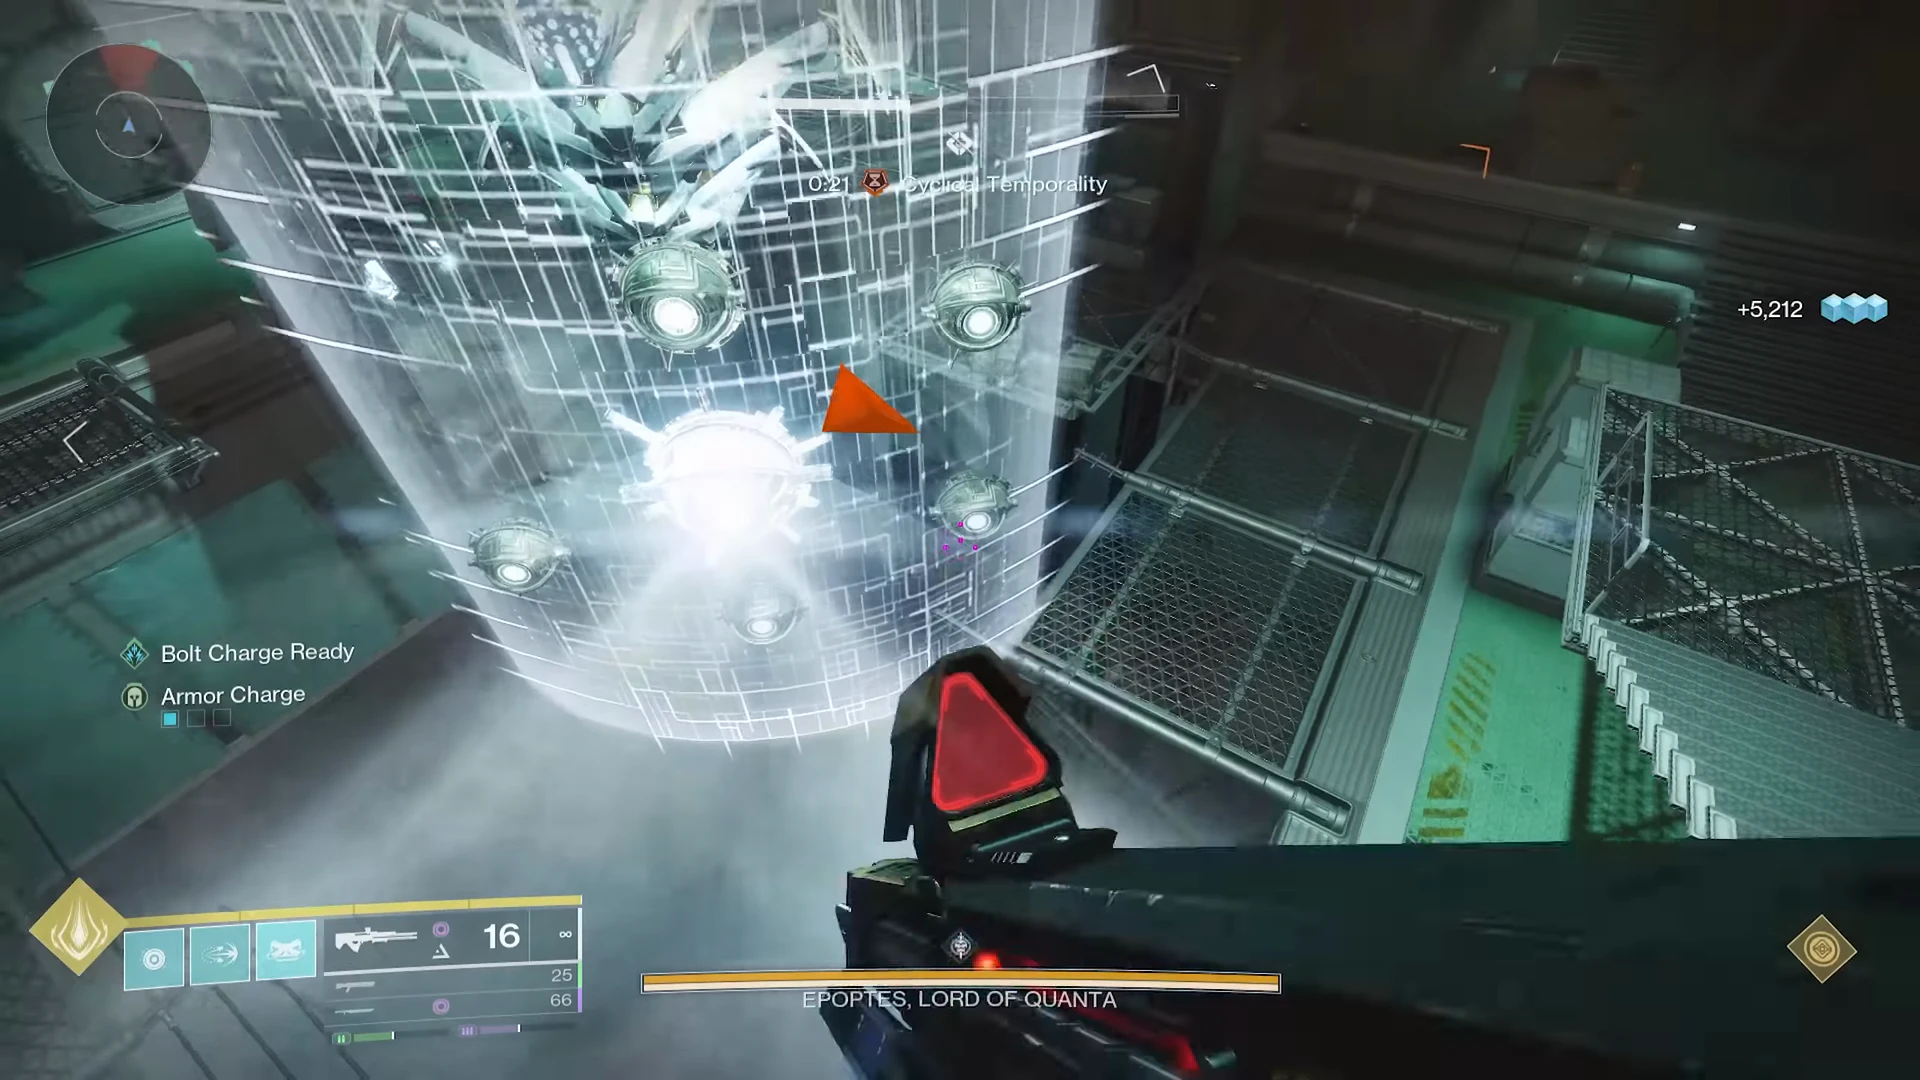
Two names appear in chat. The first name shown takes close; the second takes far. The center eye glows only on your shield. Enter your assigned light at once and follow it as it rotates.
When shield eyes appear, both beam runners break them immediately. Clearing both sets restores about ten seconds of damage. Missing a set loses that extension.
Epoptes chooses two players who have not run yet. First name takes close; second takes far. Move as soon as chat appears, not after the immune text. Three pairs rotate through, so every Guardian runs once.
Loadout and reset
- Thunderlord is the easiest ranged plan. Use Refurbished A499 with Aggregate Charge instead when the team can keep landing Epoptes's crit through every relay.
- Bring one reliable debuff, a safety Super, and saved damage Supers.
- Keep both close and far beam routes clear so the chosen pair can move at once.
- After damage, wait for both Lens Hydras to respawn, then repeat the full loop.
Final Anchor
This branch's third quest placement only appears after Epoptes dies. Place it now, then follow the exit objective toward the hub.
Secret chest
The optional chest puzzle lives on the same forced backtrack. Touch four fixed symbols in landmark order, then enter the moving sphere after the confirmation message.
Four symbols on the return path
These four locations are static. Walk close enough to activate each symbol while backtracking from the boss; use the landmark order below instead of hunting all nine.
- Low left wallCrouch beside the circular wall juts and face back toward Epoptes.
- Left wall chamberCheck the rectangular chamber on the left side of the return route.
- Upper-right ceilingLook up at the ceiling of the right-side structure, facing the way you came.
- Right wall by the sphereDrop to the opposite wall near the large green sphere and face the wall.
After number fourWatch for “A whisper on unknown winds wishes its visitors well,” then enter the large moving sphere and loot the chest inside.
Landmark positions adapted into original schematics from SaintScout's static community maps. Location matters more than the community map's corrected symbol numbering.
Iatros
Inward-Turned · Wyvern
Right podiumThree shooters + climberAnchors 7–9
Six Chronons start the clock. Three shooters hit matching box heights on the fourth Diastole charge while one climber races a disappearing staircase.
Anchors
This optional quest stop is separate from the raid mechanic. Map and Territory needs 12 Anchor placements: two on this approach and one after Iatros dies.
Place both before the door
Anchors 7–8 of 12. Both exist during the approach and can disappear when someone interacts at the boss door. Confirm two placements before entering.
Encounter
Quest check complete. Use the portrait below to identify Iatros, assign P1–P6, then work through mechanics, challenge, and damage.
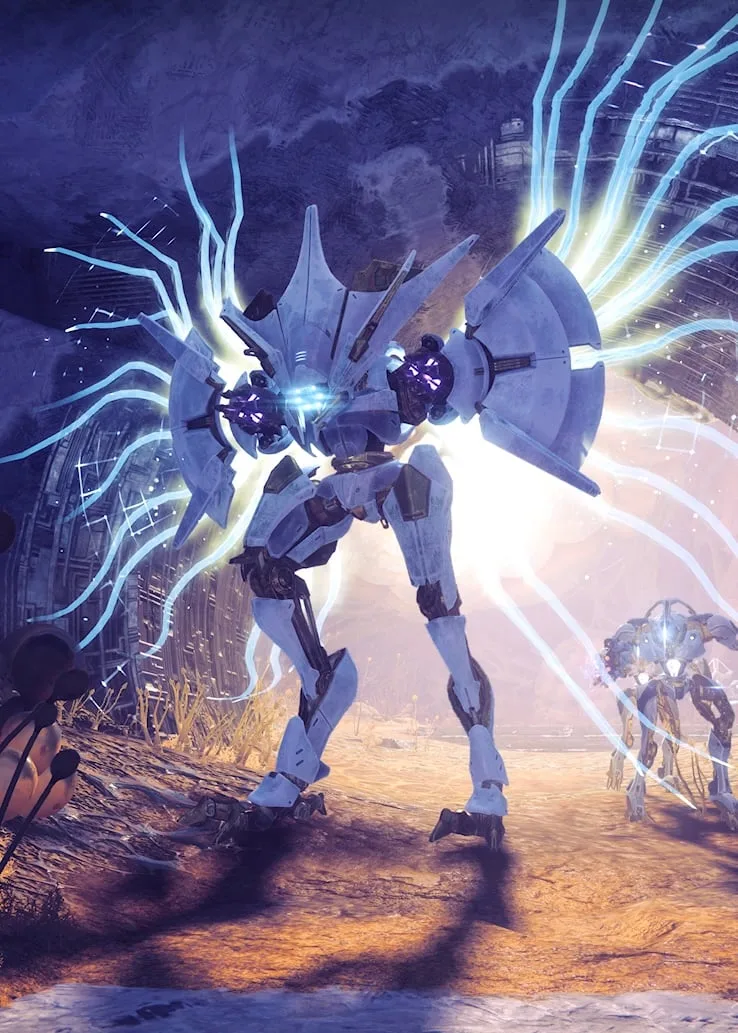
Fill six. Shoot on four. Climb three.
In-game portrait via Destinypedia · image © BungieThe Diastole staircase
- Prime the hourglass
Kill the six middle Minotaurs. Every player takes one Chronon and runs through the ring above the hourglass. When all six are deposited, shoot the diamond below.
- Find the starting plate
A plate lights at Spawn, Middle, or Hell. P4 takes it. Diastole now builds to four, one charge per second, then boops any player touching the ground. The cycle restarts at one right away.
- Shoot bottom on four
P1, P2, and P3 break their bottom boxes at the instant the fourth charge fills. Do not wait for the boop animation to finish. A clean three-way break creates P4’s first platform set.
- Climber controls the cadence
P4 climbs three platforms, interacts with the hologram, then calls ready. The shooters repeat middle, then top, each on a fresh four-count. Old platforms vanish when the next row appears.
- Roamers bank insurance
P5 and P6 kill fresh Minotaurs and hold one Chronon each. Failed box timing drains the hourglass; deposit reserves if Neomutation starts, even during damage.
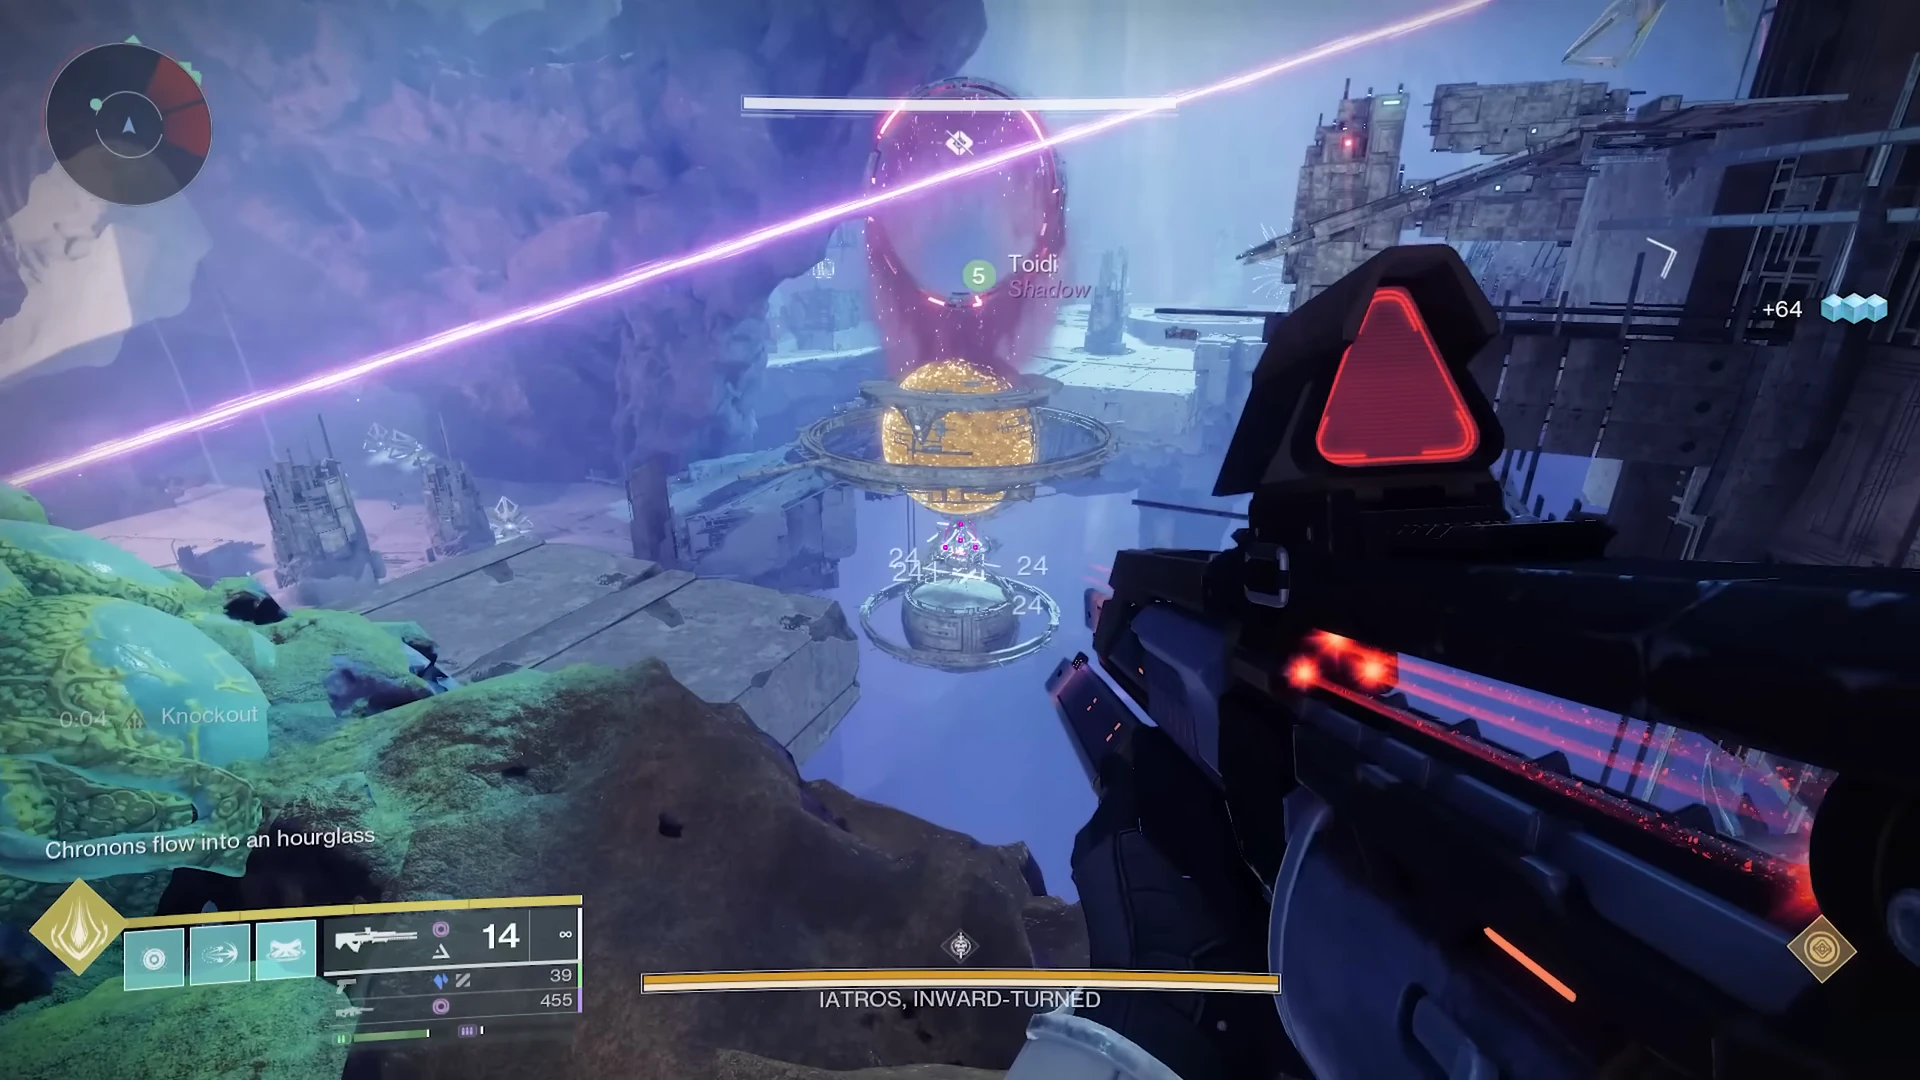 Shoot this diamond
Look directly below the gold hourglass. The trigger is not the hoop: it is this bright, white Vex diamond on the lower disc. Shoot it once to begin the plate phase.
- First fourBottom boxes. Climber takes the first three platforms.
- Second fourMiddle boxes only after the climber calls ready.
- Third fourTop boxes. Interact with the last hologram to open damage.
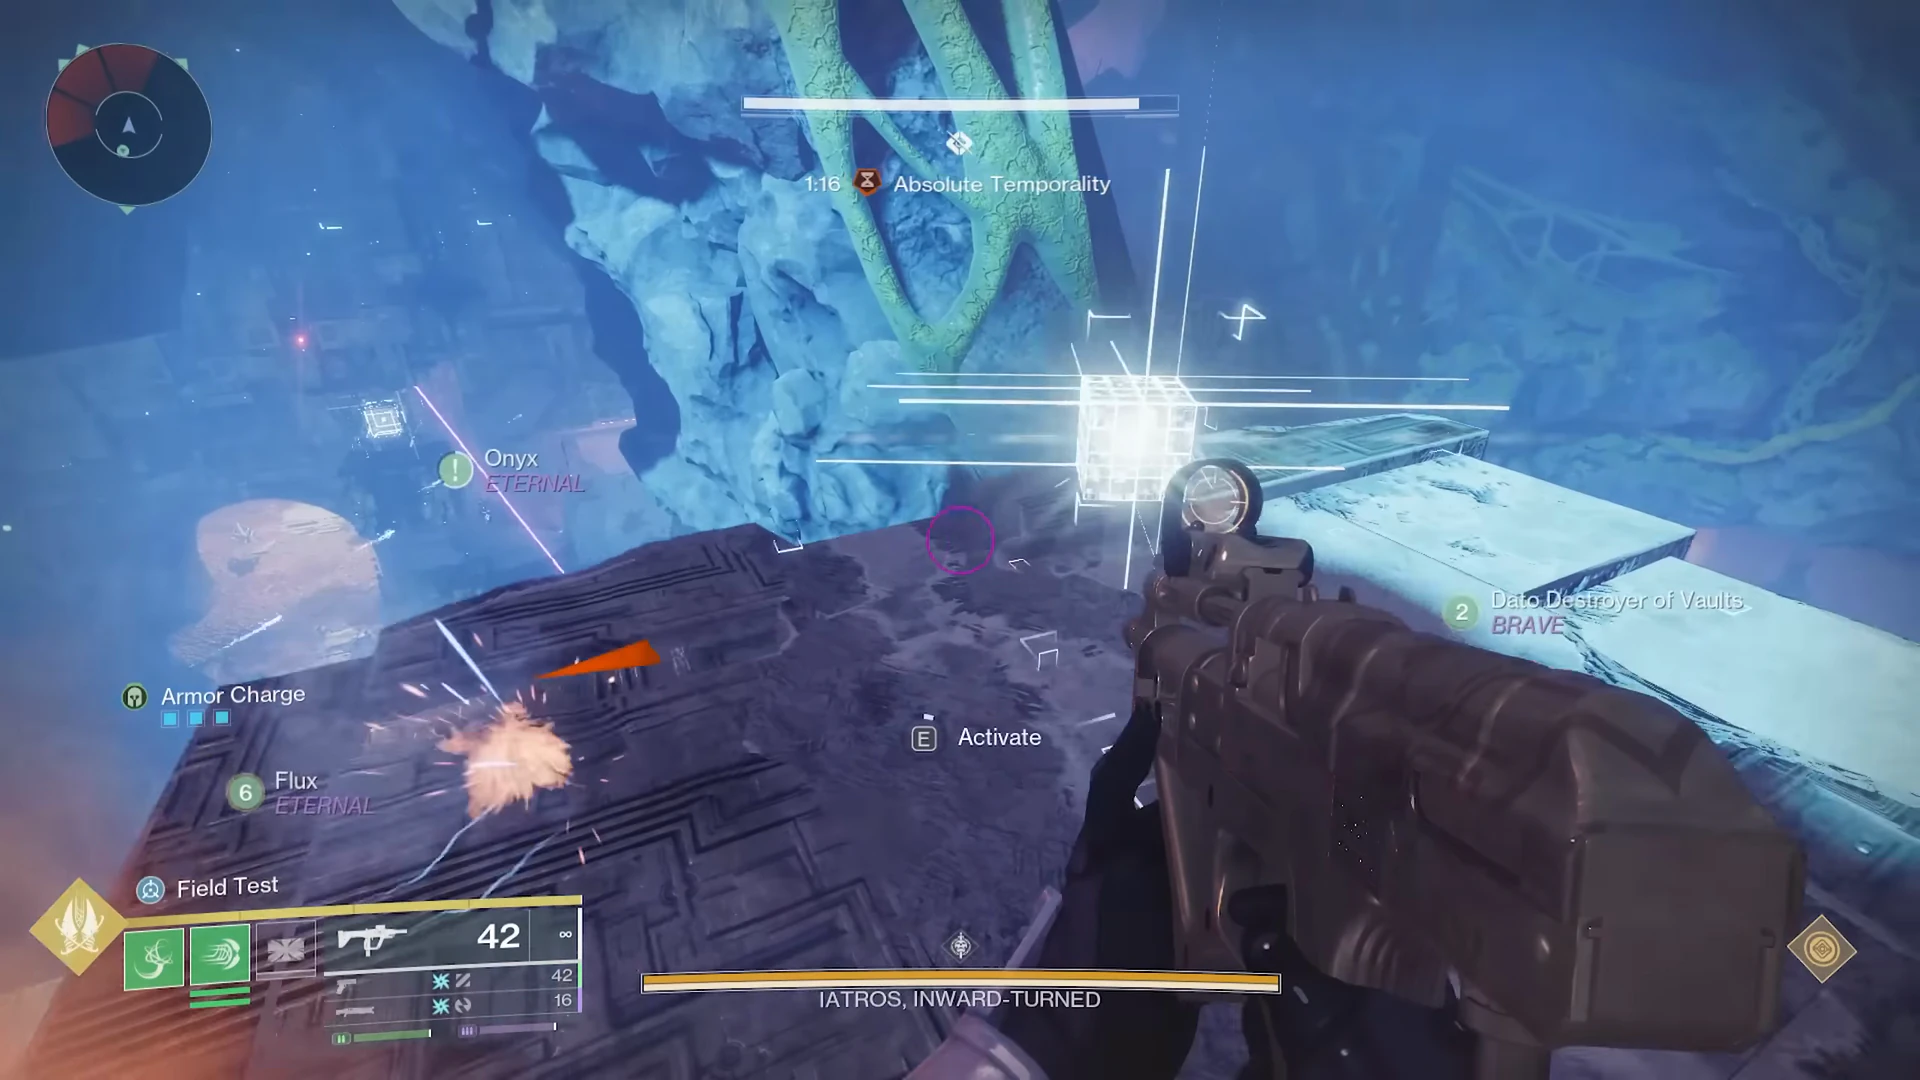
Meet the boss at the starting plate
- Iatros teleports to whichever plate began the climb, so stage there before damage.
- Build Grand Overture's missile meter during setup, then special-reload before Iatros lands so Volley Ready is primed when damage opens.
- Fire the volley, keep landing slugs, and prime the next volley when it is ready. Shoot from outside stomp range; no melee loop or catalyst is required.
- Keep spare Chronons visible; a drained hourglass can trigger Neomutation during damage.
- After damage, six new middle Minotaurs restart the loop and refill the hourglass.
Final Anchor
This branch's third quest placement only appears after Iatros dies. Place it now, then follow the exit objective toward the hub.
Secret chest
The optional chest puzzle lives on the same forced backtrack. Touch four fixed symbols in landmark order, then enter the moving sphere after the confirmation message.
Four symbols on the return path
These four locations are static. Walk close enough to activate each symbol while backtracking from the boss; use the landmark order below instead of hunting all nine.
- Exit-side ledgeLeaving Iatros, hug the left edge before committing to the moving route.
- Lower-left half-sphereFind the half-sphere with a smaller sphere mounted on it.
- Blue sphere structureClimb the structure around the large blue ball and inspect its columns.
- Upper-right gold half-sphereNear the far side, check the smaller sphere nested in the gold half-shell.
After number fourWatch for “A whisper on unknown winds wishes its visitors well,” then enter the large moving sphere and loot the chest inside.
Landmark positions adapted into original schematics from SaintScout's static community maps. Location matters more than the community map's corrected symbol numbering.
Agraios
Inherent · Hobgoblin
Back podiumOne detain runnerAnchors 10–12
Charge five rings, identify the boss copy attacking the team, stabilize every ring but the red one, then run all five to turn a grenade into the detain that stops the wipe.
Anchors
This optional quest stop is separate from the raid mechanic. Map and Territory needs 12 Anchor placements: two on this approach and one after Agraios dies.
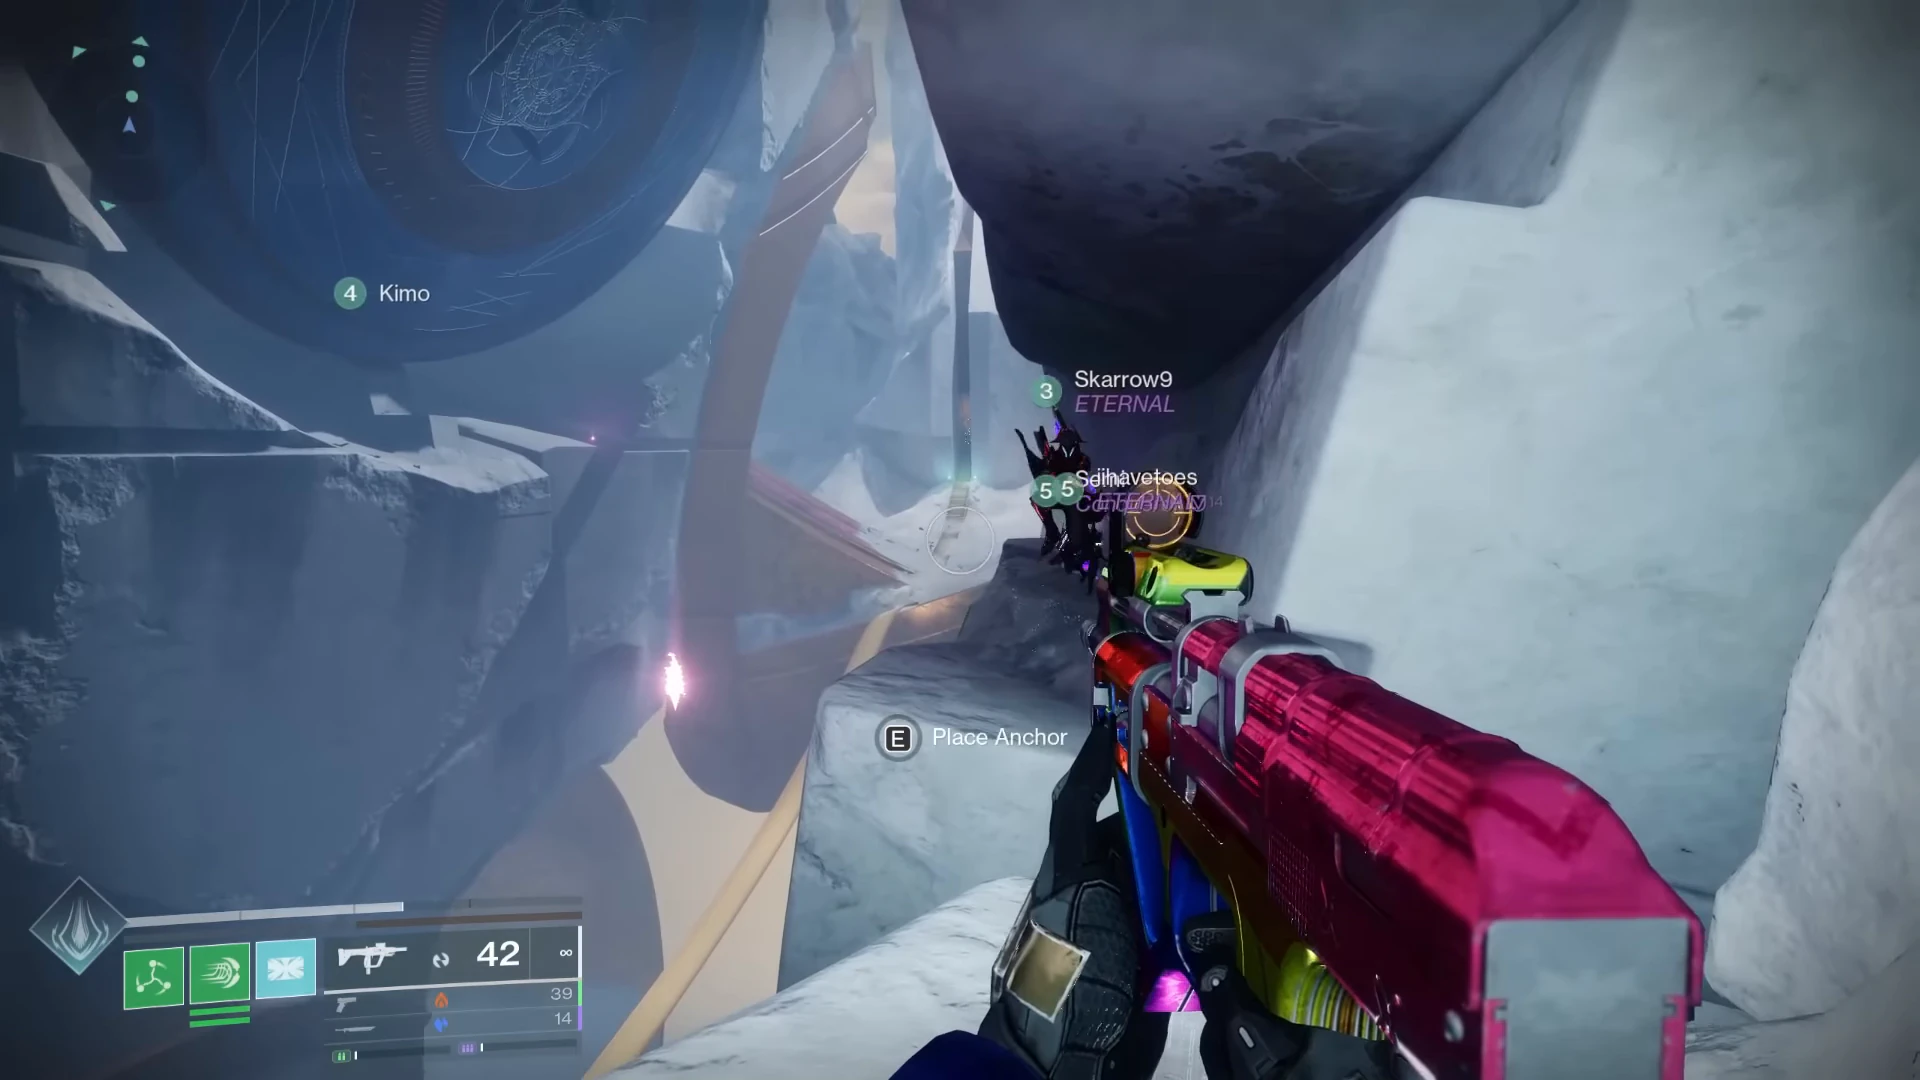
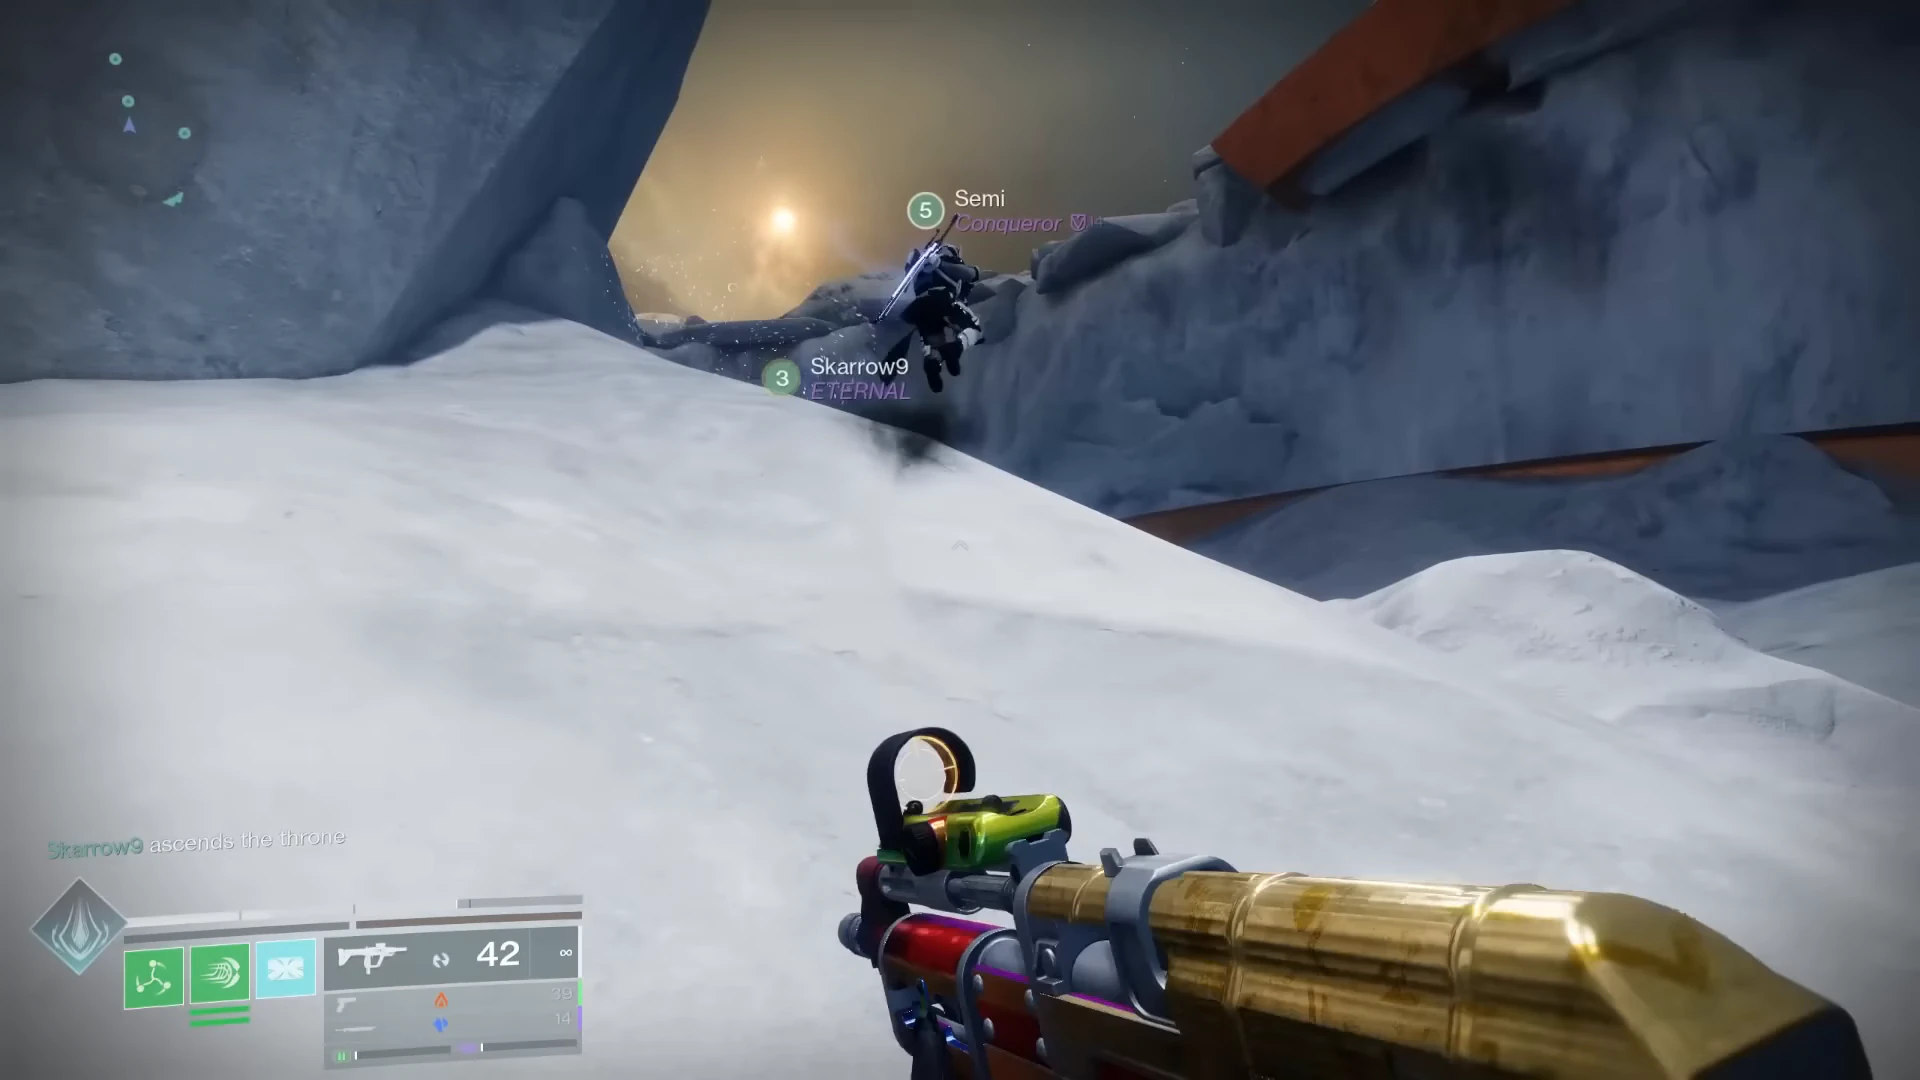
Place both before the door
Anchors 10–11 of 12. Both exist during the approach and can disappear when someone interacts at the boss door. Confirm two placements before entering.
Encounter
Quest check complete. Use the portrait below to identify Agraios, assign P1–P6, then work through mechanics, challenge, and damage.
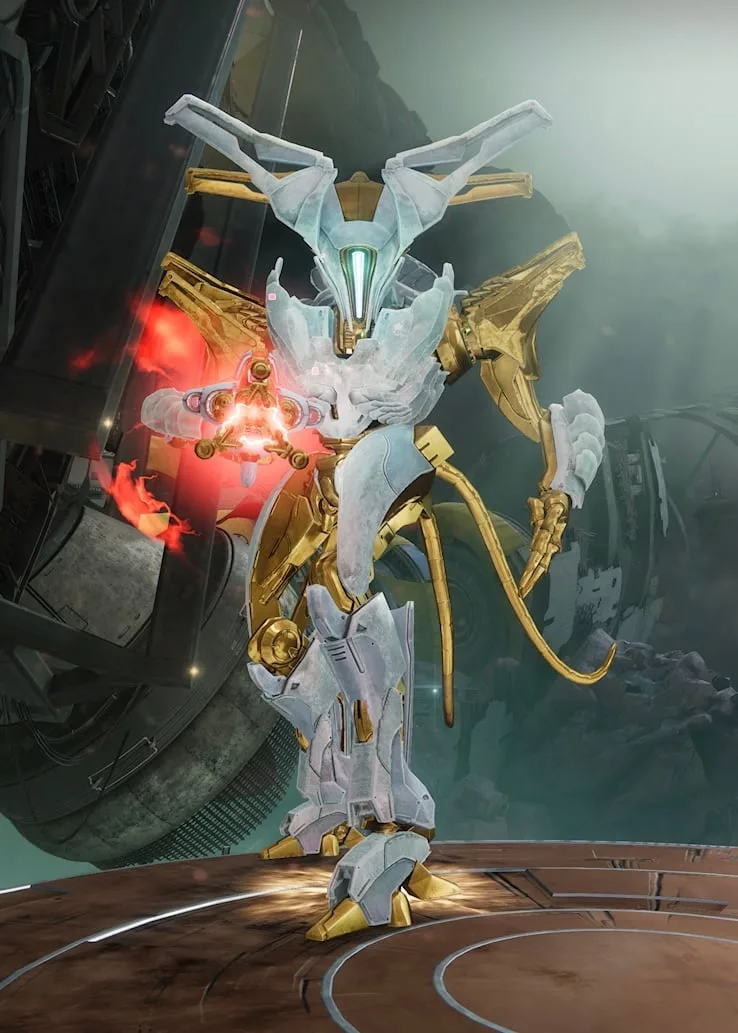
Skip red. Run every ring.
In-game portrait via Destinypedia · image © BungieBuild the detain
- Power rings 1 through 5
Kill the boss Hydra to spawn Chronon Minotaurs. Carry one Chronon through every ring. Number them clockwise from bottom-left so all later calls use 1 to 5.
- Take any three Temporality plates
P2, P3, and P4 take the plates. Their fixed jobs do not depend on which buff name each receives. When a Made copy begins the lethal laser, everyone dips behind cover to reset the countdown.
- Matching buff finds red
Read the attacking copy’s on-screen name. Whichever plate holder happens to match it sees the red ring, calls its number, and activates the pylon under that copy. No permanent Constant, Absolute, or Cyclical role is needed.
- Stabilize the other four
P1, P5, and P6 add one Chronon to every ring except the called red ring. Plate holders stay out of unstable rings because crossing one with Temporality is lethal.
- Runner crosses 1 to 5
Once all rings turn blue, P1 runs all five to fill Alignment Stabilized and convert their grenade into Vex detain. P1 calls ring four so everyone groups beside rings 4 and 5.
- Lowest timer calls; P1 detains
Everyone watches their own wipe timer and the lowest calls it loudly. At three or two, P1 throws the converted grenade at the grouped fireteam. The detain shields everyone, kills the copy, and opens damage after cleanup. The lowest timer calls; it does not choose a new runner.
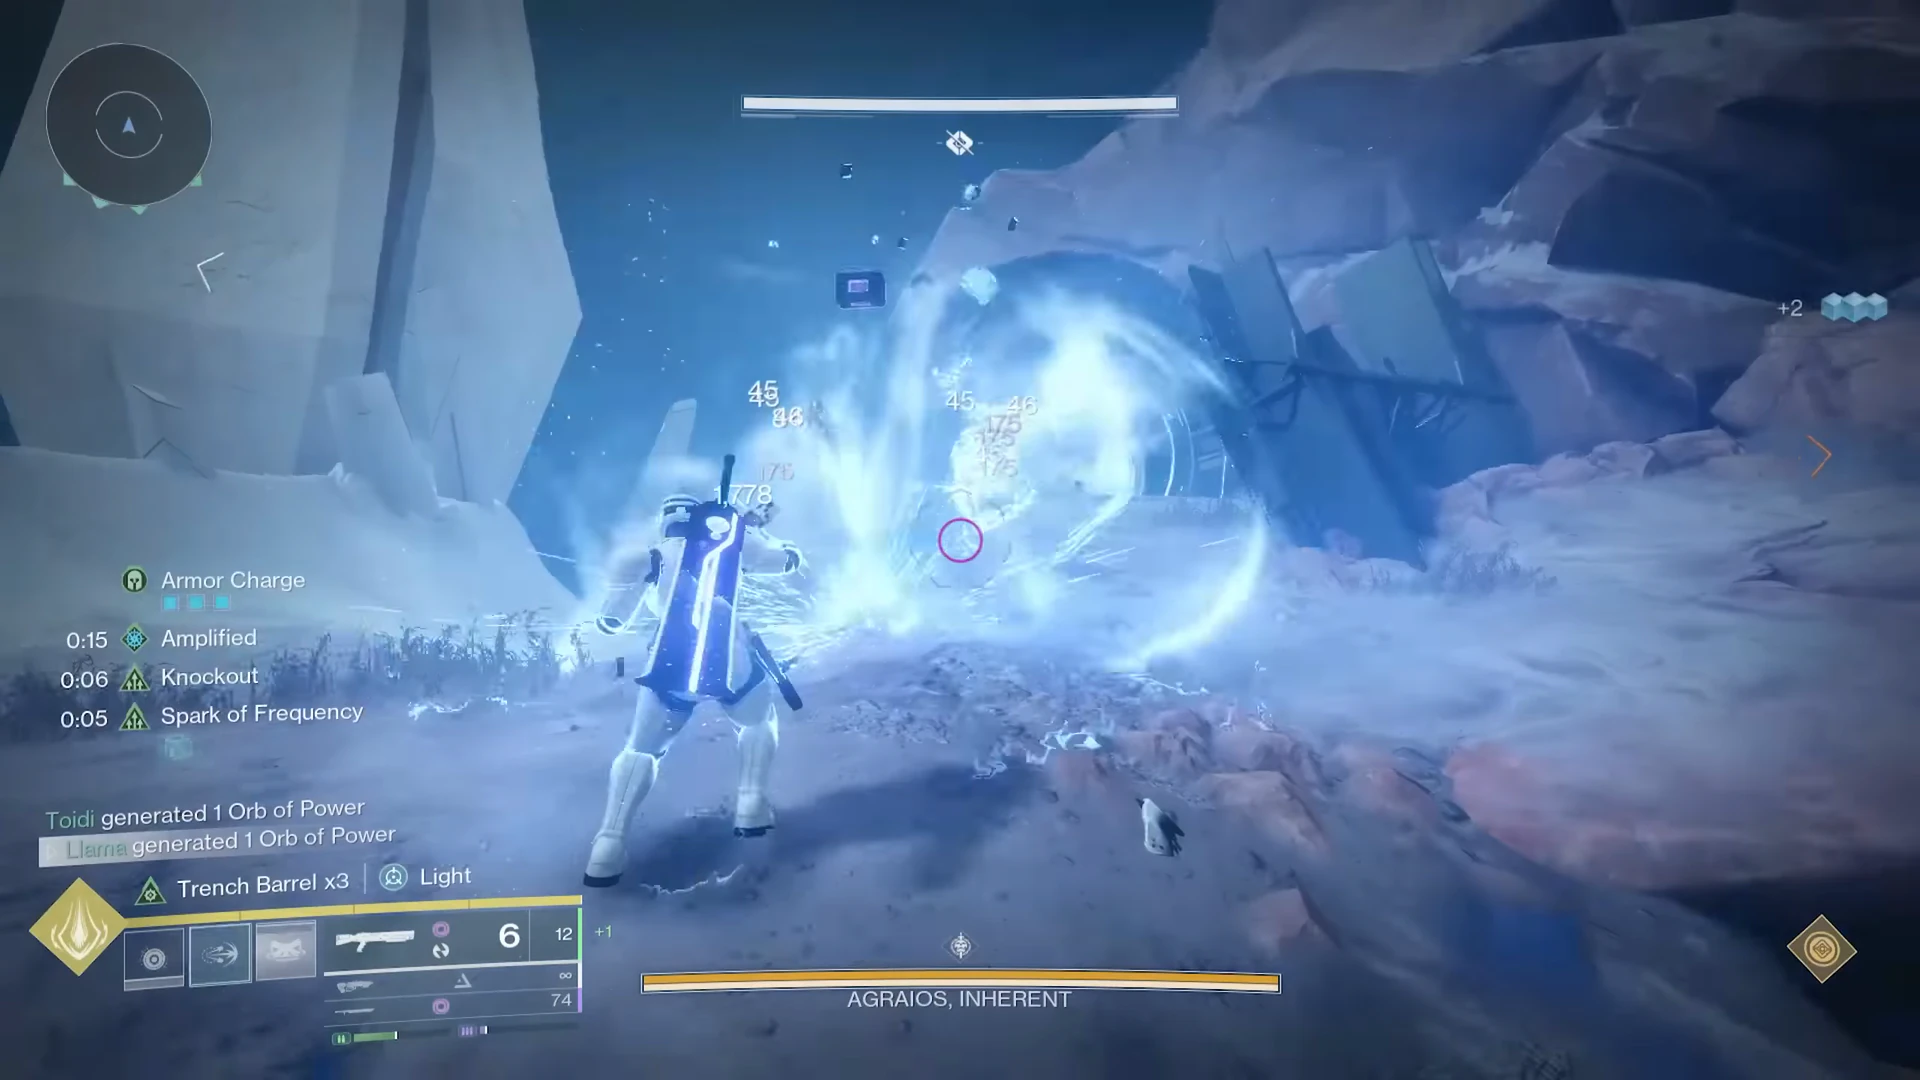 Blue-white pickup
A Time's Burden Minotaur leaves this bright blue-white pickup. Walk over it, check for the Cobalt Chronons HUD buff, then physically pass through one inactive ring.
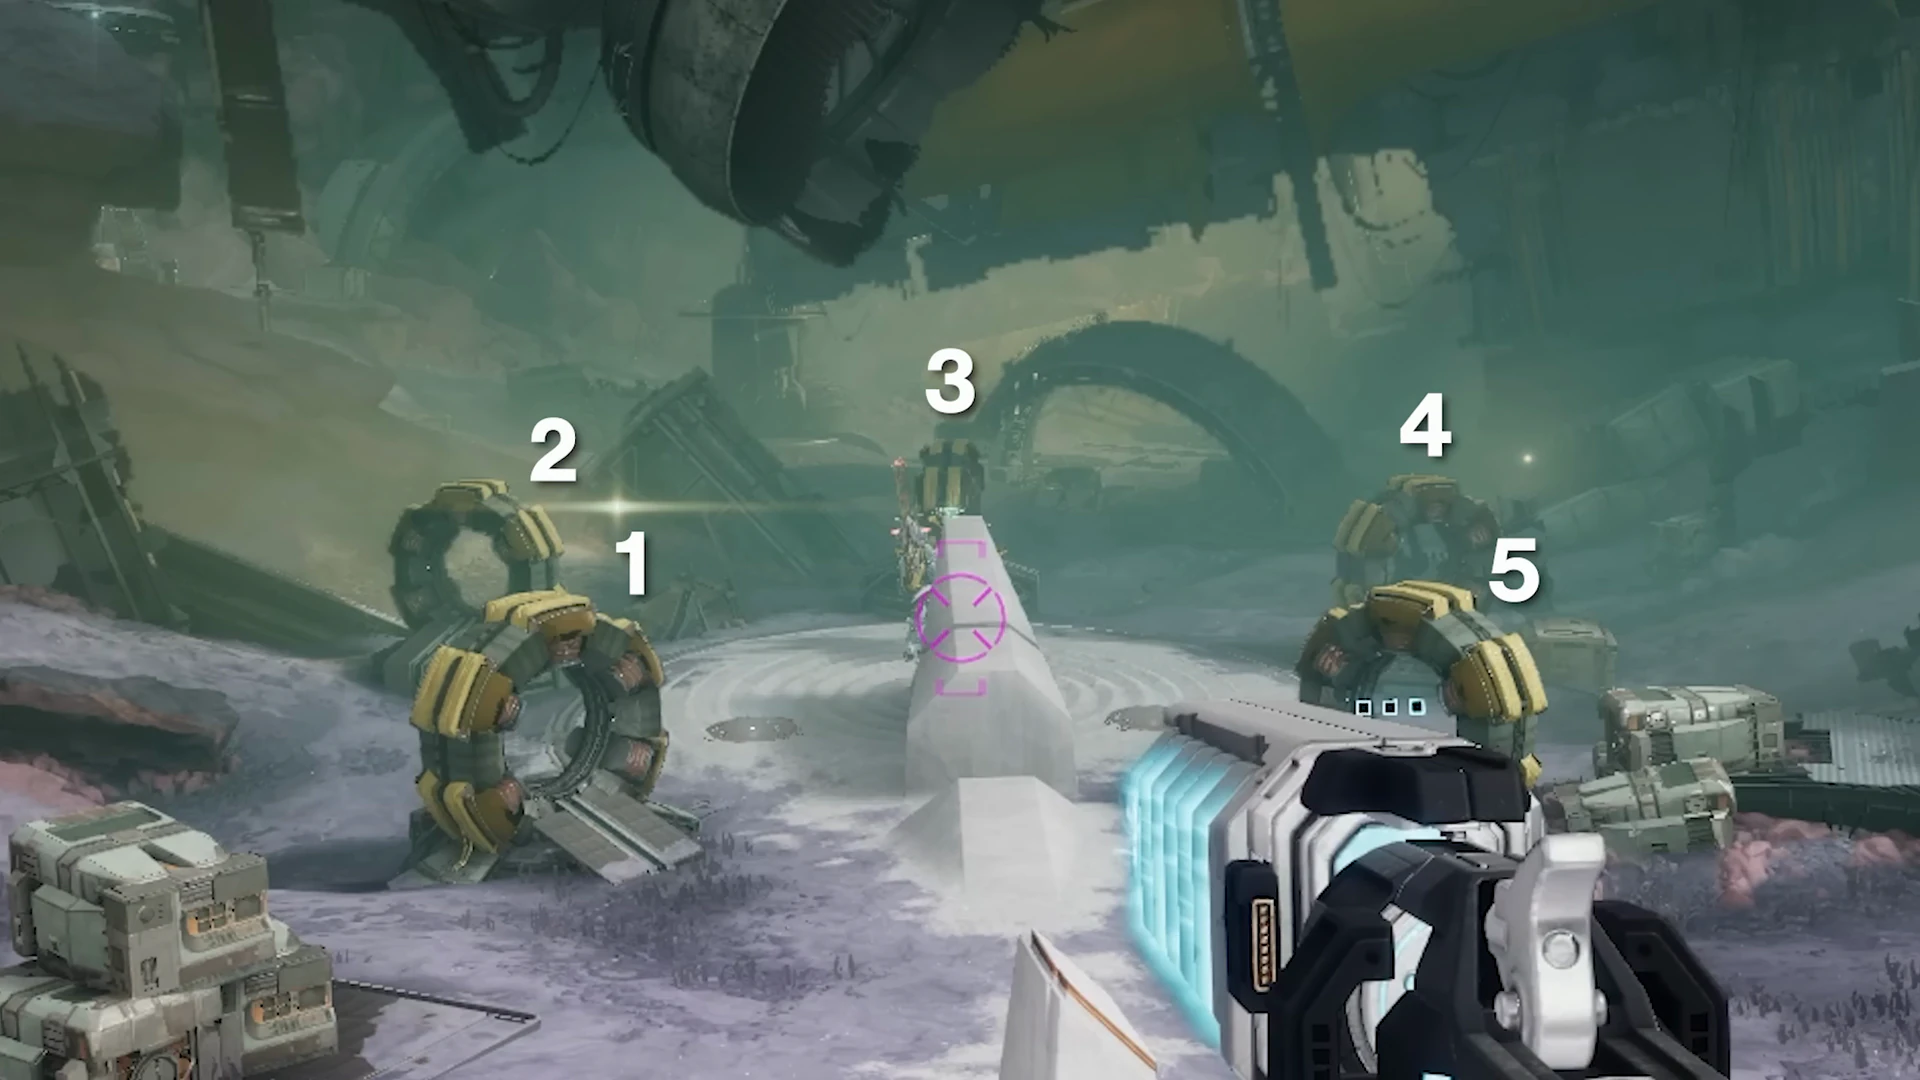
Run again inside damage
- Clear active Hydras and nearby adds during the roughly 20-second pre-damage window.
- Thunderlord is the forgiving choice through teleports. Refurbished A499 with Aggregate Charge is the higher sustained option if the team can reacquire the crit.
- When Alignment Stabilized returns, P1 immediately crosses all five rings.
- The lowest timer calls the next laser; P1 throws the detain at three or two to resume damage after the boss teleports.
- Complete two in-damage run sequences for the full phase, three detains total.
- Repeat from the Hydra and Chronon setup if the boss survives.
Final Anchor
This branch's third quest placement only appears after Agraios dies. Place it now, then follow the exit objective toward the hub.
Secret chest
The optional chest puzzle lives on the same forced backtrack. Touch four fixed symbols in landmark order, then enter the moving sphere after the confirmation message.
Four symbols on the return path
These four locations are static. Walk close enough to activate each symbol while backtracking from the boss; use the landmark order below instead of hunting all nine.
- Entrance-side lower wallBacktrack toward the entrance and sweep the lower-left outer wall.
- Upper-left side roomCross to the upper-left chamber; the symbol sits deep inside the room.
- Upper-right hallwayTake the large high opening on the right wall and follow it to the end.
- Small hole aboveDrop to the mid-right wall and look inside the small, untrimmed hole overhead.
After number fourWatch for “A whisper on unknown winds wishes its visitors well,” then enter the large moving sphere and loot the chest inside.
Landmark positions adapted into original schematics from SaintScout's static community maps. Location matters more than the community map's corrected symbol numbering.
Koregos
the Worldline · Final boss
Forward podiumFive buffs + one roamFinal encounter
Constant finds color, Cyclical validates glow, and Absolute breaks the result. Three synchronized double-deposits fill the hourglass before a four-totem set intersection.
Anchor checkpoint
This is hub Anchor 3, not a new Koregos route. If every quest holder placed it in Predestination, skip ahead; otherwise climb the back-left pillar before the pull.
Encounter
Quest check complete. Use the portrait below to identify Koregos, assign P1–P6, then work through mechanics, challenge, and damage.
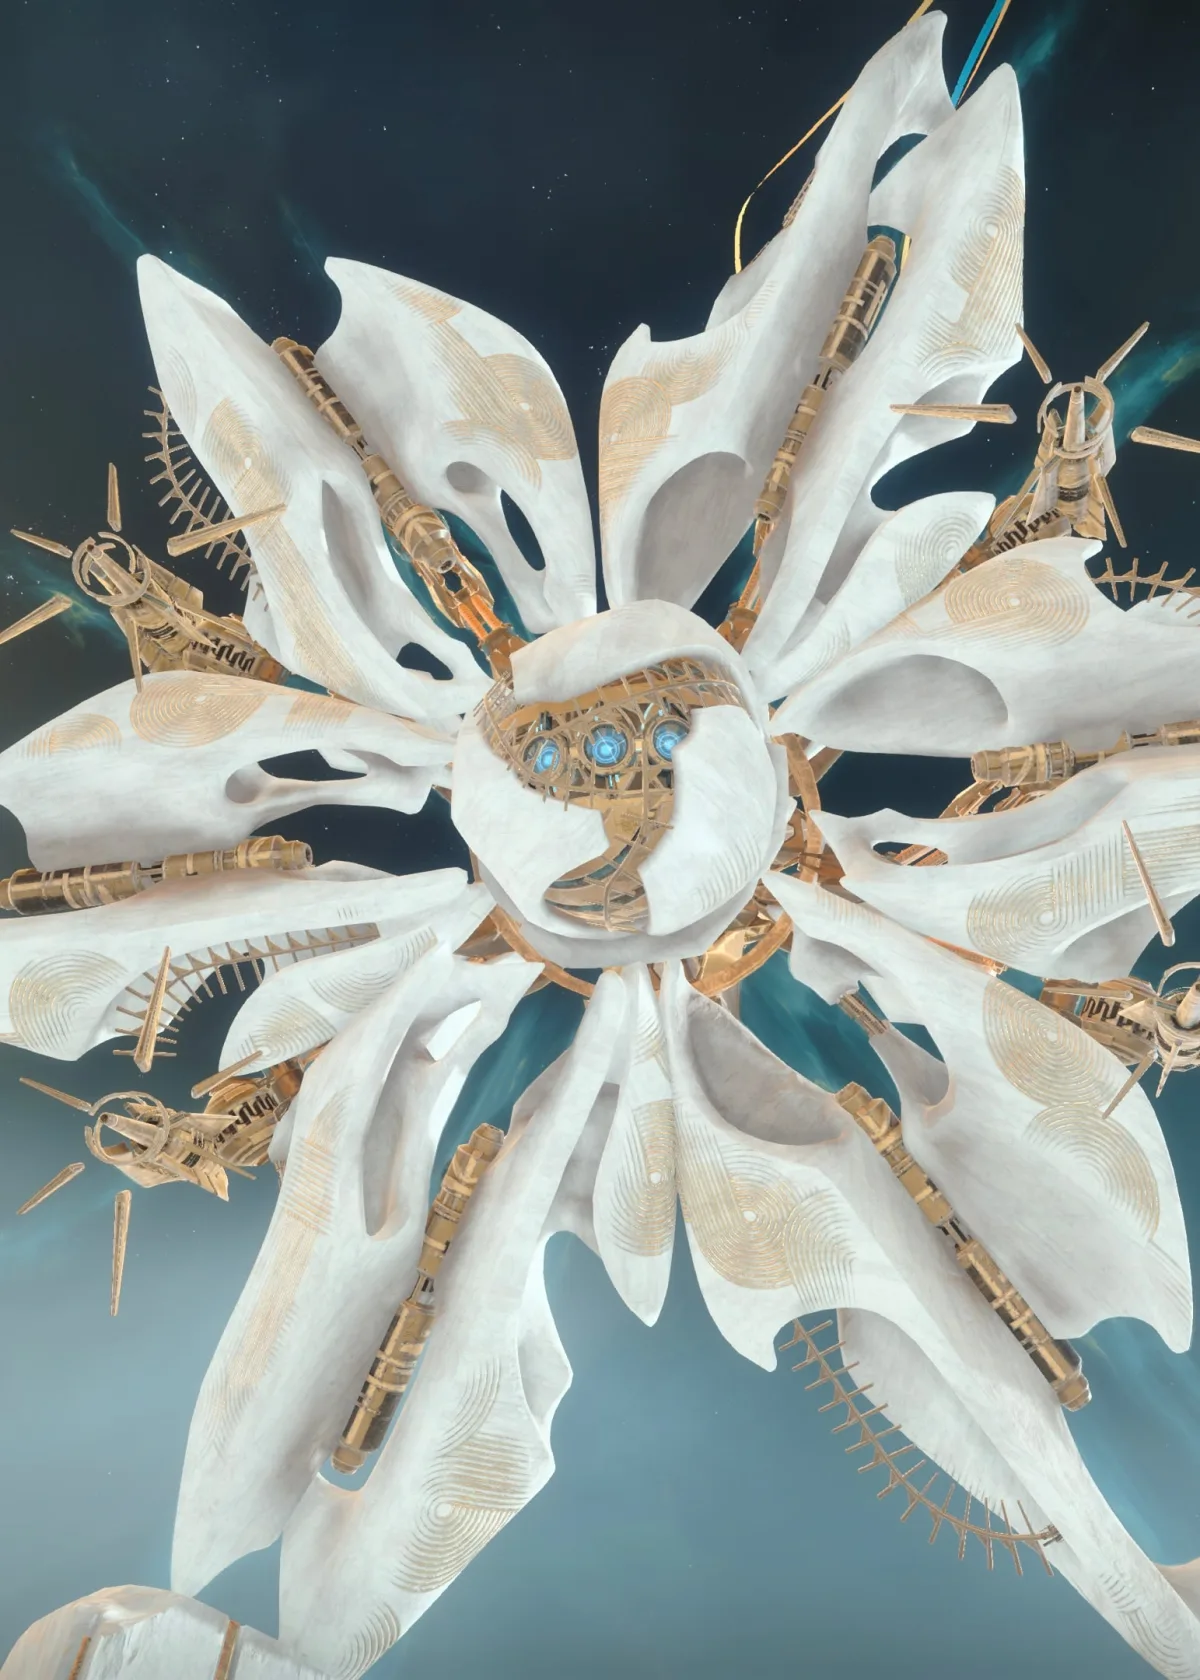
Color. Glow. Break. Double-dunk.
In-game portrait via Destinypedia · image © BungieThe information chain
- Unlock all three plates
Kill the Hydras above left, middle, and right. Five players step on their assigned plates: two Constant left, one Absolute middle, and two Cyclical right.
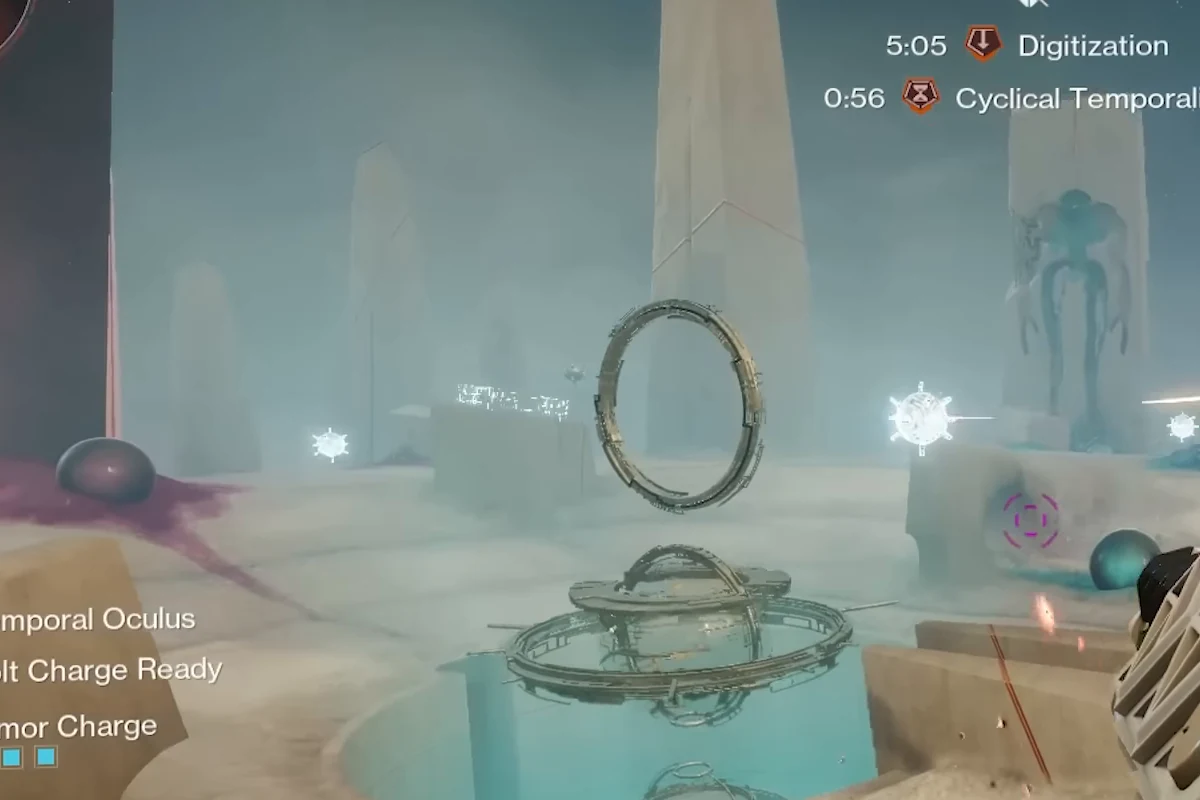
- Constant opens the Oculus
A Constant player breaks all four boss lasers. Temporal Oculus appears on the four stone pillars. Keep the other Constant available to suppress new lasers.
- Jump the same pillar together
One Constant, Absolute, and both Cyclicals count 3, 2, 1 and cross the same aura. All four need Temporal Oculus before the information chain works.
- Resolve two mines
Absolute calls the hourglass color. Constant points at each matching mine. Cyclicals answer yes or no for glow. Absolute breaks the two YES mines.
- Deposit as a pair
Both Cyclicals collect one Chronon and count down a simultaneous deposit. Repeat at three pillars for six total, then shoot the diamond below the hourglass.
- Choose four common cubes
Ride the platforms onto Koregos. At each totem, Constant and Cyclical stand between the two cubes they see. Absolute interacts with the cube position common to both.
Ignore the mine’s base color. Cyclical only reports whether the white aura exists.
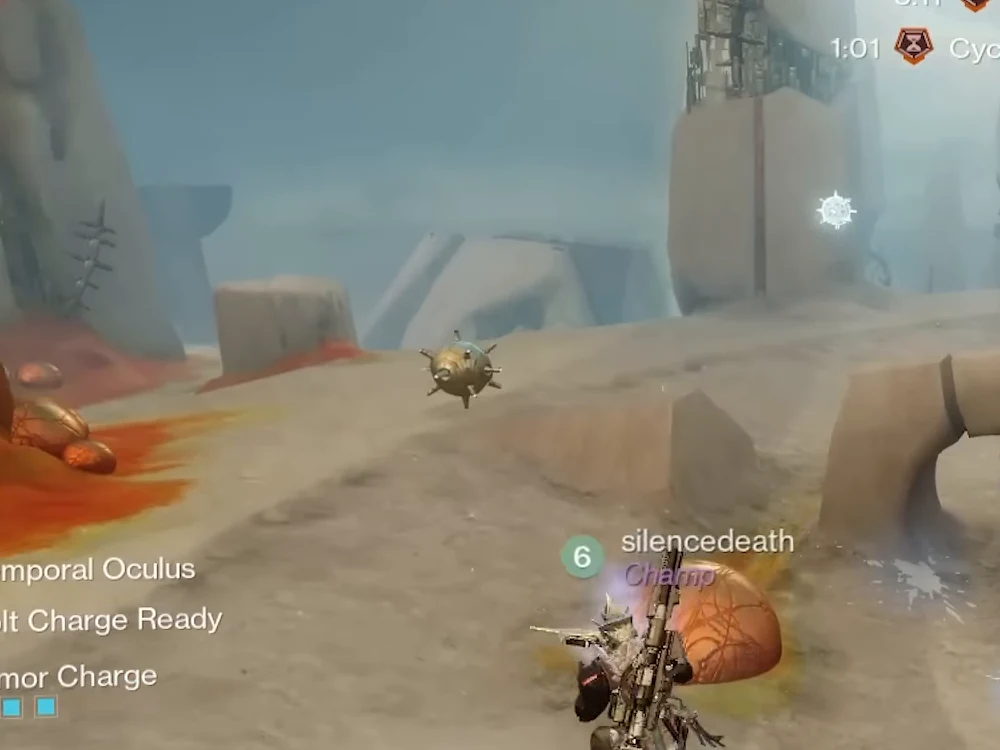
- AbsoluteCall the hourglass colorOnly middle knows whether the target set is red, blue, or white.
- ConstantPoint at matching minesShoot each mine of that color so the Cyclical pair can identify it.
- Cyclical ×2Answer yes or noSay YES when that mine glows for you. There are two valid mines.
- AbsoluteBreak both YES minesThe Cyclical pair can now collect one Chronon each.
On top: choose the common cube
At each totem, Constant and Cyclical stand between the two cubes they can see. Absolute interacts with the one position shared by both pairs. Repeat at all four totems.
 Wireframe cube
Look for three small, white wireframe cubes around each totem. Constant and Cyclical stand between their visible pair; Absolute holds interact on the one position both pairs share.
Three colored portals
- Assign one portal runner, ideally the Tractor Cannon player, away from the main stack.
- Thunderlord is the easiest mobile lane. Refurbished A499 with Aggregate Charge gives stronger sustained and total damage when the shooter can keep the crit in view.
- Each portal is red, blue, or white while one Chronon of every color spawns nearby.
- The runner collects and deposits the matching color to extend damage, three times total.
- Well can cover the stack, but sidestep the two rotating lasers instead of trusting it.
- Save damage Supers for a tight normal-mode final stand.
- Keep the portal runner’s sightline clear; they need to see both portal and Chronon spawns.
What this Page trusts
Encounter strategy: synthesized from Llama D2’s “Optimized NO BS” guide and the supplied transcript. The Page follows his Epoptes, Iatros, Agraios, then Koregos learning order while preserving the raid’s nonlinear choice.
Quest route: synthesized from Datto’s Envoy’s Tog Anchor guide and the supplied transcript. Quest frames use its 1080p60 master; encounter frames use Llama’s 1440p60 master.
Damage: rebuilt for Monument of Triumph from the “Destiny 2: Endgame Analysis” ranking and shopping-list workbook, the sustained-damage analysis in “The Final State of Destiny's Weapon Sandbox”, and the final artifact review in “Analyzing Destiny's Final Artifact Mods”. Sandbox changes were checked against Bungie’s 9.7.0 weapon tuning, while Grand Overture’s base missile loop was checked against its live Bungie item definition. The recommendations favor repeatable raid clears over short-window spreadsheet peaks.
Challenges, objects, and portraits: encounter Challenge rules and Chronon naming were cross-checked against Destinypedia’s Desert Perpetual encounter record. Each boss portrait links back to its individual Destinypedia gallery; all depicted game imagery belongs to Bungie.
Secret chests: the four static locations for each return route were redrawn from SaintScout’s community maps and corrections. Landmark position—not disputed symbol numbering—is the source of truth.
Scope: normal mode only. Optional encounter Challenges are included; Epic mechanics and loot tables are intentionally excluded. Boss and mechanic spellings use in-game forms where automated transcripts disagreed.
Last reviewed: 20 July 2026. Destiny 2 and the captured game imagery belong to Bungie. The fireteam artwork was supplied for this Page. This is a personal, non-commercial guide for friends.